Master AWS EKS Setup with Terraform | Deploy Kubernetes Like a Pro!
Key Topics covered:
- Software installation
- Setting up Terraform for Infrastructure as Code (IaC)
- Defining EKS cluster configurations with Terraform
- IAM Role and Policy Attachments for EKS
- Launching Worker Nodes
- Scaling EKS Node Groups
- Best Practices and Tips
Description:
In this step-by-step tutorial, you'll discover how to set up an Amazon Web Services (AWS) Elastic Kubernetes Service (EKS) cluster using Terraform. EKS is a managed Kubernetes service that makes it easier to deploy, manage, and scale containerized applications using Kubernetes.
- Terraform Infrastructure as a code (IaC)
- AWS Console
- EKSCTL using Elastic Kubernetes services command line
- CloudFormation Infrastructure as a code (IaC) an AWS service
1: Tools Required
We must install the following application on computer for us to get started
- Terraform
- EKSCTL
- KubeCTL
- AWS CLI
- Visual Studio Code
1.1.Terraform Installation:
Terraform is widely used nowadays to automate provisioning of infrastructure. There is cloud version and desktop version. We are going to use the desktop version which is free. Follow below link to install it
Install Terraform1.2.EKSCTL:
EKSCTL is a tool that can be used also to provision infrastructure through commandline interface. It uses CloudFormation stacks to provision all required components. Follow below link to install it
Install EKSCTL1.3.KUBECTL:
KUBECTL is a commandline interface tool for communication with Kubernetes Cluster's Plan. It is used to kubernetes commands such as deploying applications on the cluster. Follow below link to install it
Install KUBECTL1.4.AWS CLI:
Amazon Web Services Command Line Interface, is a tool used to manage AWS services using command line. We used it to connect to AWS infrastructure from our Personal Computers or servers. Follow below link to install it
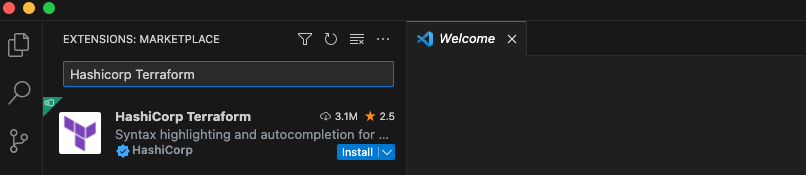
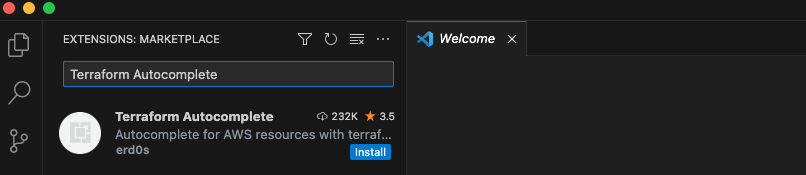
Install AWS CLIAdd Visual Studio Code Extensions
We need ato add the following extensions.
- Hashicorp Terraform
- Terraform Autocomplete
2. Step-by-step guide to provision a cluster:
We are going to Terraform (IaC). We can have a repeatable process to provision and remove infrastructures when required. Follow Steps below
- Check if you are logged in on AWS by running the following command aws sts get-caller-identity. If you are not, please go to step below.
- Configure AWS on your computer by running the following command aws configure Create AWS Secret And Access keys on AWS IAM service. Choose a region where you want to deploy you infrastructure.
- Note:// The user must have permissions to create a cluster
2.1. Create Terraform Work Directory:
Create a new folder eks-terraform-provision by running this command mkdir -p eks-terraform-provision Open your Visual Studio Code application by running the following commands
- Get into the folder we created cd eks-terraform-provision
- Open Visual Studio Codecode .
Below are the list of terraform files that we are going to create the Infrastructure on AWS
- Get into the folder we created cd eks-terraform-provision
- Open Visual Studio Codecode .
2.2. Create variables.tf file:
Take note of your region and their subnets ids. You can get them on Vpc section subnets
variable "subnet_id_1" {
  type    = string
  default = "subnet-0a53bf81c96accf7a"
}

variable "subnet_id_2" {
  type    = string
  default = "subnet-09089dd08ae2a345b"
}

variable "subnet_id_3" {
  type    = string
  default = "subnet-06d7511159db69c8e"
}

variable "region" {
  type    = string
  default = "eu-west-3"
}
2.3. Create variables.tf file:
This Terraform configuration file is used to provision and configure an Amazon Elastic Kubernetes Service (EKS) cluster along with associated IAM roles and policies. Let's break down the key components and their functions in this configuration file:. Replace codewithbisky with your organisation name
2.3.1. Provider Configuration:
                provider "aws" {
                  region = var.region
                }
This section configures the AWS provider with the specified AWS region, which is provided as a variable var.region.
2.3.2. IAM Role for EKS Cluster:
              resource "aws_iam_role" "eks-iam-role" {
  name = "eks-cluster-iam-role"
  path = "/"
  assume_role_policy = <<EOF
                    {
      "Version": "2012-10-17",
      "Statement": [
        {
          "Effect": "Allow",
          "Principal": {
            "Service": "eks.amazonaws.com"
          },
          "Action": "sts:AssumeRole"
        }
      ]
    }
  EOF
}
This resource block defines an IAM role named eks-cluster-iam-role that allows the EKS service to assume this role. The assume_role_policy specifies that the EKS service can assume this role.
2.3.3. IAM Role Policy Attachments for EKS Cluster:
             resource "aws_iam_role_policy_attachment" "AmazonEKSClusterPolicy" {
  policy_arn = "arn:aws:iam::aws:policy/AmazonEKSClusterPolicy"
  role       = aws_iam_role.eks-iam-role.name
}
These resources attach the policies (AmazonEKSClusterPolicy and AmazonEC2ContainerRegistryReadOnly) to the IAM role created earlier. These policies grant permissions required for EKS cluster operation.
2.3.4. EKS Cluster Resource:
resource "aws_eks_cluster" "codewithbisky-eks" {
  name     = "codewithbisky"
  version  = "1.24"
  role_arn = aws_iam_role.eks-iam-role.arn

  vpc_config {
    subnet_ids = [var.subnet_id_1, var.subnet_id_2, var.subnet_id_3]
  }

  depends_on = [
    aws_iam_role.eks-iam-role,
  ]
}
This resource block defines the EKS cluster named codewithbisky. It specifies the version, IAM role, and VPC configuration for the cluster.
2.3.5. IAM Role for Worker Nodes:
resource "aws_iam_role" "workernodes" {
  name = "eks-node-group-codewithbisky"
  assume_role_policy = jsonencode({
    Statement = [{
      Action = "sts:AssumeRole"
      Effect = "Allow"
      Principal = {
        Service = "ec2.amazonaws.com"
      }
    }]
    Version = "2012-10-17"
  })
}
This resource block defines an IAM role for worker nodes, allowing EC2 instances to assume this role.
2.3.6. IAM Role Policy Attachments for Worker Nodes:
Several resources of type aws_iam_role_policy_attachment attach various policies to the IAM role for worker nodes. These policies grant permissions required for worker nodes to interact with EKS and other AWS services.
2.3.7. EKS Node Group Resource:
resource "aws_eks_node_group" "worker-node-group" {
  cluster_name    = aws_eks_cluster.codewithbisky-eks.name
  node_group_name = "codewithbisky-workernodes"
  node_role_arn   = aws_iam_role.workernodes.arn
  subnet_ids      = [var.subnet_id_1, var.subnet_id_2, var.subnet_id_3]
  instance_types  = ["t3.micro"]

  scaling_config {
    desired_size = 1
    max_size     = 2
    min_size     = 1
  }

  depends_on = [
    aws_iam_role_policy_attachment.AmazonEKSWorkerNodePolicy,
    aws_iam_role_policy_attachment.AmazonEKS_CNI_Policy,
    #aws_iam_role_policy_attachment.AmazonEC2ContainerRegistryReadOnly,
  ]
}
This resource block defines an EKS node group, which represents the worker nodes that will run within the EKS cluster. It specifies the cluster name, node group name, IAM role for the worker nodes, and other configurations such as instance types and scaling settings.
2.3.8. Complete main.ts file:
terraform {
  required_providers {
    aws = {
      source = "hashicorp/aws"
    }
  }
}

# Configure the AWS Provider
provider "aws" {
  region = var.region
}

resource "aws_iam_role" "eks-iam-role" {
  name = "eks-cluster-iam-role"

  path = "/"

  assume_role_policy = <<EOF
                    {
 "Version": "2012-10-17",
 "Statement": [
  {
   "Effect": "Allow",
   "Principal": {
    "Service": "eks.amazonaws.com"
   },
   "Action": "sts:AssumeRole"
  }
 ]
}
EOF

}

resource "aws_iam_role_policy_attachment" "AmazonEKSClusterPolicy" {
  policy_arn = "arn:aws:iam::aws:policy/AmazonEKSClusterPolicy"
  role       = aws_iam_role.eks-iam-role.name
}
resource "aws_iam_role_policy_attachment" "AmazonEC2ContainerRegistryReadOnly-EKS" {
  policy_arn = "arn:aws:iam::aws:policy/AmazonEC2ContainerRegistryReadOnly"
  role       = aws_iam_role.eks-iam-role.name
}

resource "aws_eks_cluster" "codewithbisky-eks" {
  name     = "codewithbisky"
  version = "1.24"
  role_arn = aws_iam_role.eks-iam-role.arn

  vpc_config {
    subnet_ids = [var.subnet_id_1, var.subnet_id_2, var.subnet_id_3]
  }

  depends_on = [
    aws_iam_role.eks-iam-role,
  ]
}
#worker Nodes
resource "aws_iam_role" "workernodes" {
  name = "eks-node-group-codewithbisky"

  assume_role_policy = jsonencode({
    Statement = [{
      Action = "sts:AssumeRole"
      Effect = "Allow"
      Principal = {
        Service = "ec2.amazonaws.com"
      }
    }]
    Version = "2012-10-17"
  })
}

resource "aws_iam_role_policy_attachment" "AmazonEKSWorkerNodePolicy" {
  policy_arn = "arn:aws:iam::aws:policy/AmazonEKSWorkerNodePolicy"
  role       = aws_iam_role.workernodes.name
}

resource "aws_iam_role_policy_attachment" "AmazonEKS_CNI_Policy" {
  policy_arn = "arn:aws:iam::aws:policy/AmazonEKS_CNI_Policy"
  role       = aws_iam_role.workernodes.name
}

resource "aws_iam_role_policy_attachment" "EC2InstanceProfileForImageBuilderECRContainerBuilds" {
  policy_arn = "arn:aws:iam::aws:policy/EC2InstanceProfileForImageBuilderECRContainerBuilds"
  role       = aws_iam_role.workernodes.name
}

resource "aws_iam_role_policy_attachment" "AmazonEC2ContainerRegistryReadOnly" {
  policy_arn = "arn:aws:iam::aws:policy/AmazonEC2ContainerRegistryReadOnly"
  role       = aws_iam_role.workernodes.name
}

resource "aws_eks_node_group" "worker-node-group" {
  cluster_name    = aws_eks_cluster.codewithbisky-eks.name
  node_group_name = "codewithbisky-workernodes"
  node_role_arn   = aws_iam_role.workernodes.arn
  subnet_ids      = [var.subnet_id_1, var.subnet_id_2, var.subnet_id_3]
  instance_types  = ["t3.micro"]

  scaling_config {
    desired_size = 1
    max_size     = 2
    min_size     = 1
  }

  depends_on = [
    aws_iam_role_policy_attachment.AmazonEKSWorkerNodePolicy,
    aws_iam_role_policy_attachment.AmazonEKS_CNI_Policy,
    #aws_iam_role_policy_attachment.AmazonEC2ContainerRegistryReadOnly,
  ]
}
3. Generate Infrastructure:
Save all files and run below command
- terraform init - initializing working directory
- terraform plan - Detailed infrastructure should be shown
- terraform apply - provisioning infrastructure
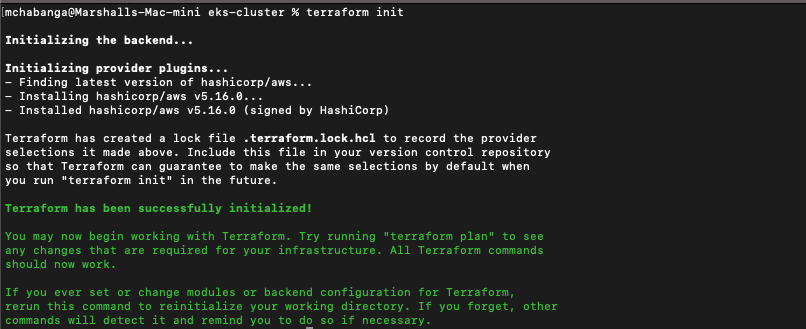
Fig 3.1 Terraform Initialization
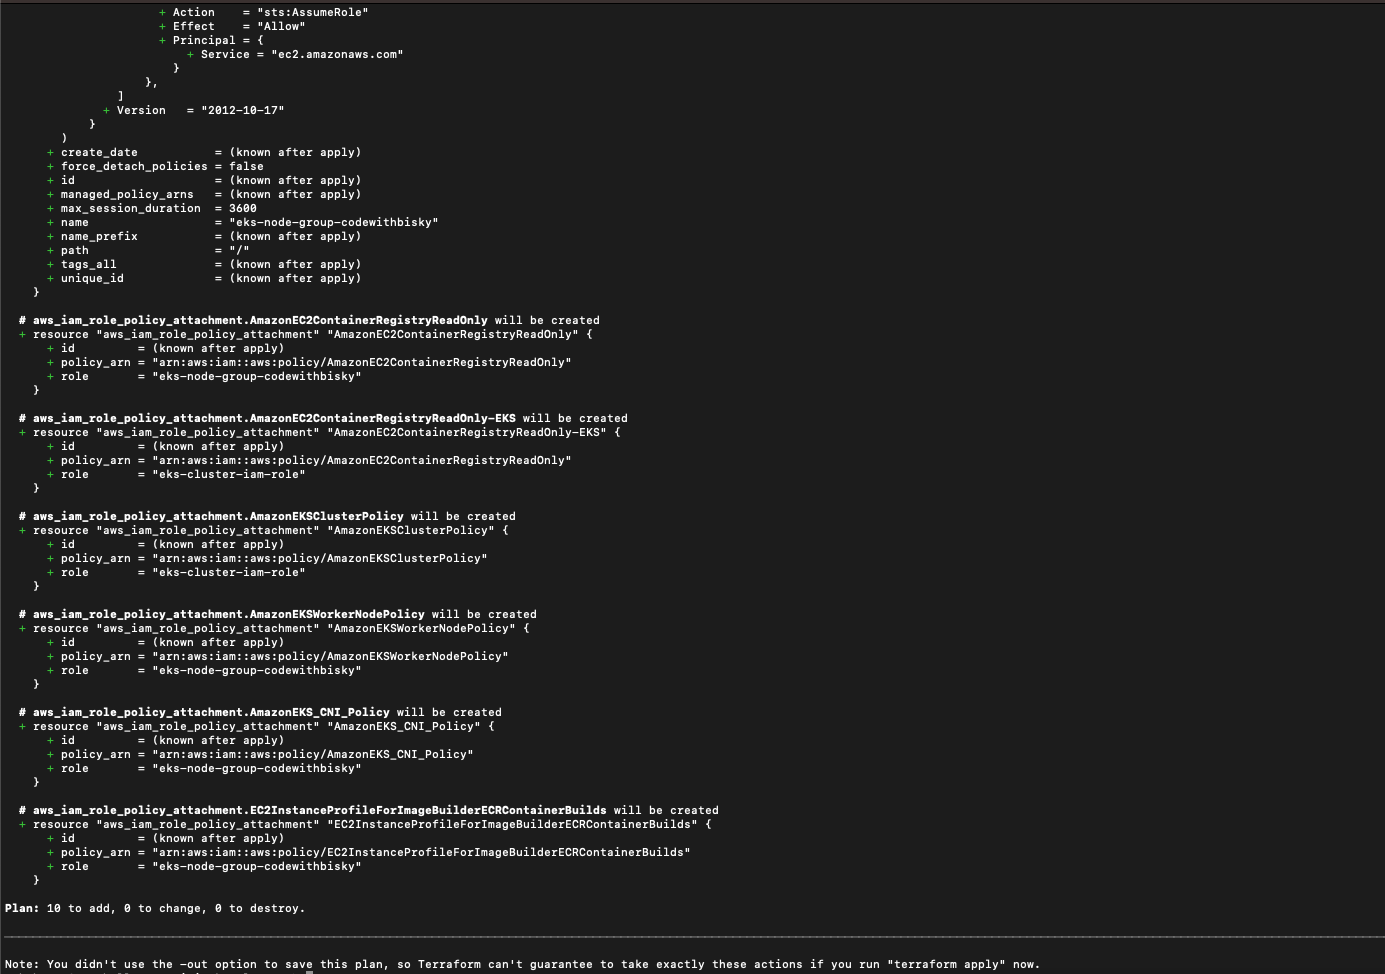
Fig 3.2 Terraform Plan

Fig 3.3 Terraform Apply Confirmation
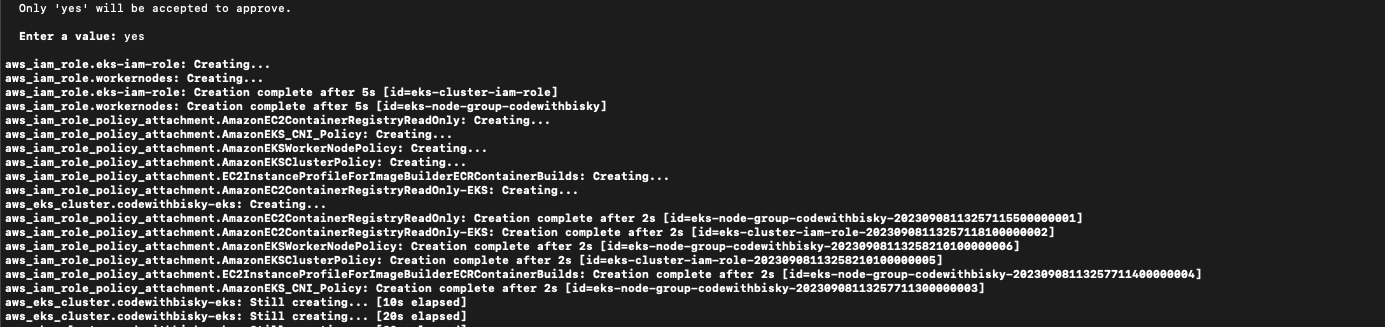
Fig 3.4 Terraform Apply Progress
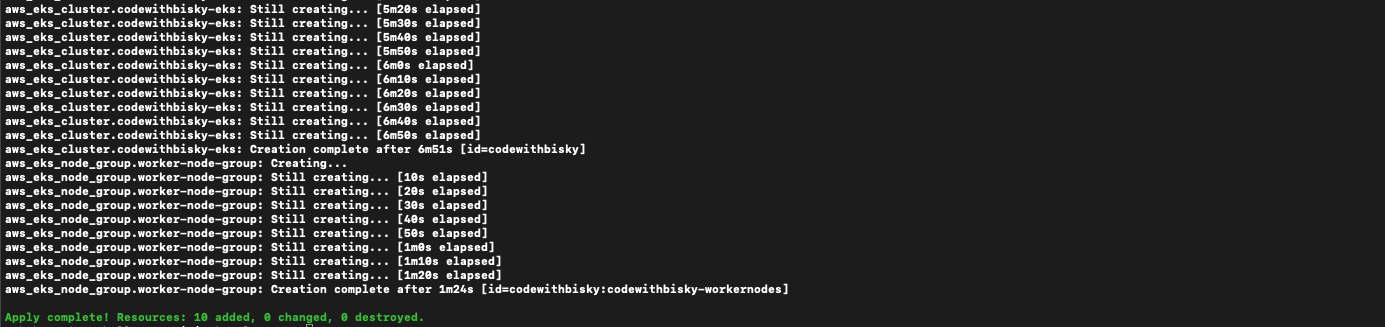
Fig 3.5 Terraform Apply Completed
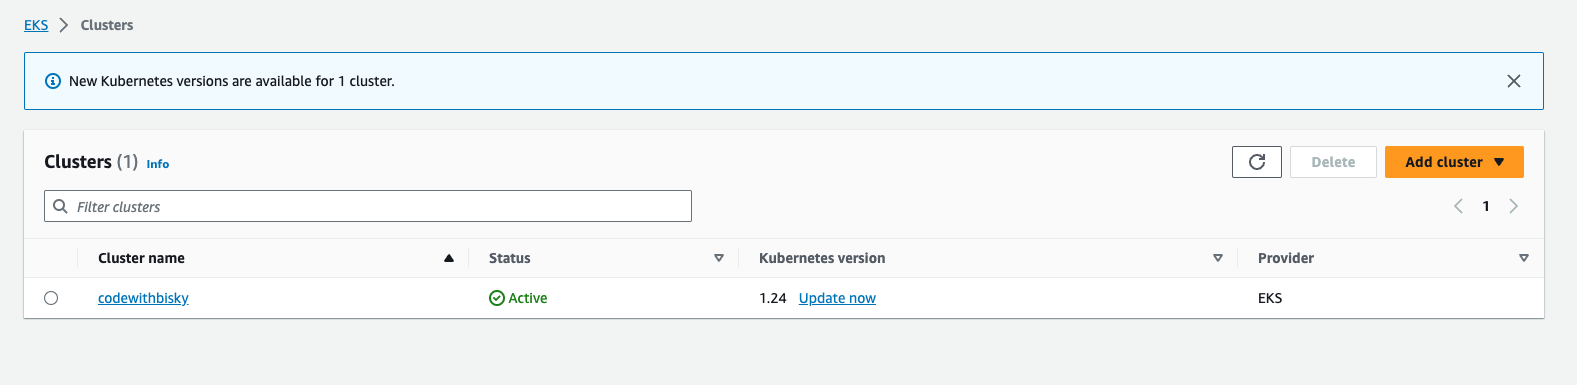
Fig 3.6 Created Cluster
4. Cluster Configuration:
4.1. Update your Kubeconfig:
Whether you provision the cluster using console, or terraform, or EksCTL, you have to create a kubeconfig on your local machine in order to communicate with the cluster.Kubectl command looks for config file in the $home/.kube folder in order to communicate with the cluster.
- aws eks update-kubeconfig --region region-code(eu-west-3 the region you configured) --name your-cluster(Cluster Name Provisioned)
Example : aws eks update-kubeconfig --region eu-west-3 --name codewithbisky
You can run below commands and see if infrastructure is accessible
- kubectl cluster-info
- kubectl get pods --all-namespaces
- kubectl get pods -o wide -n kube-system
- kubectl get svc

Fig 4.1 Kubectl Commands
4.2 Destroy Infrastructure:
- terraform destroy - It will remove the cluster and all setup done to it and all permissions provisioned.
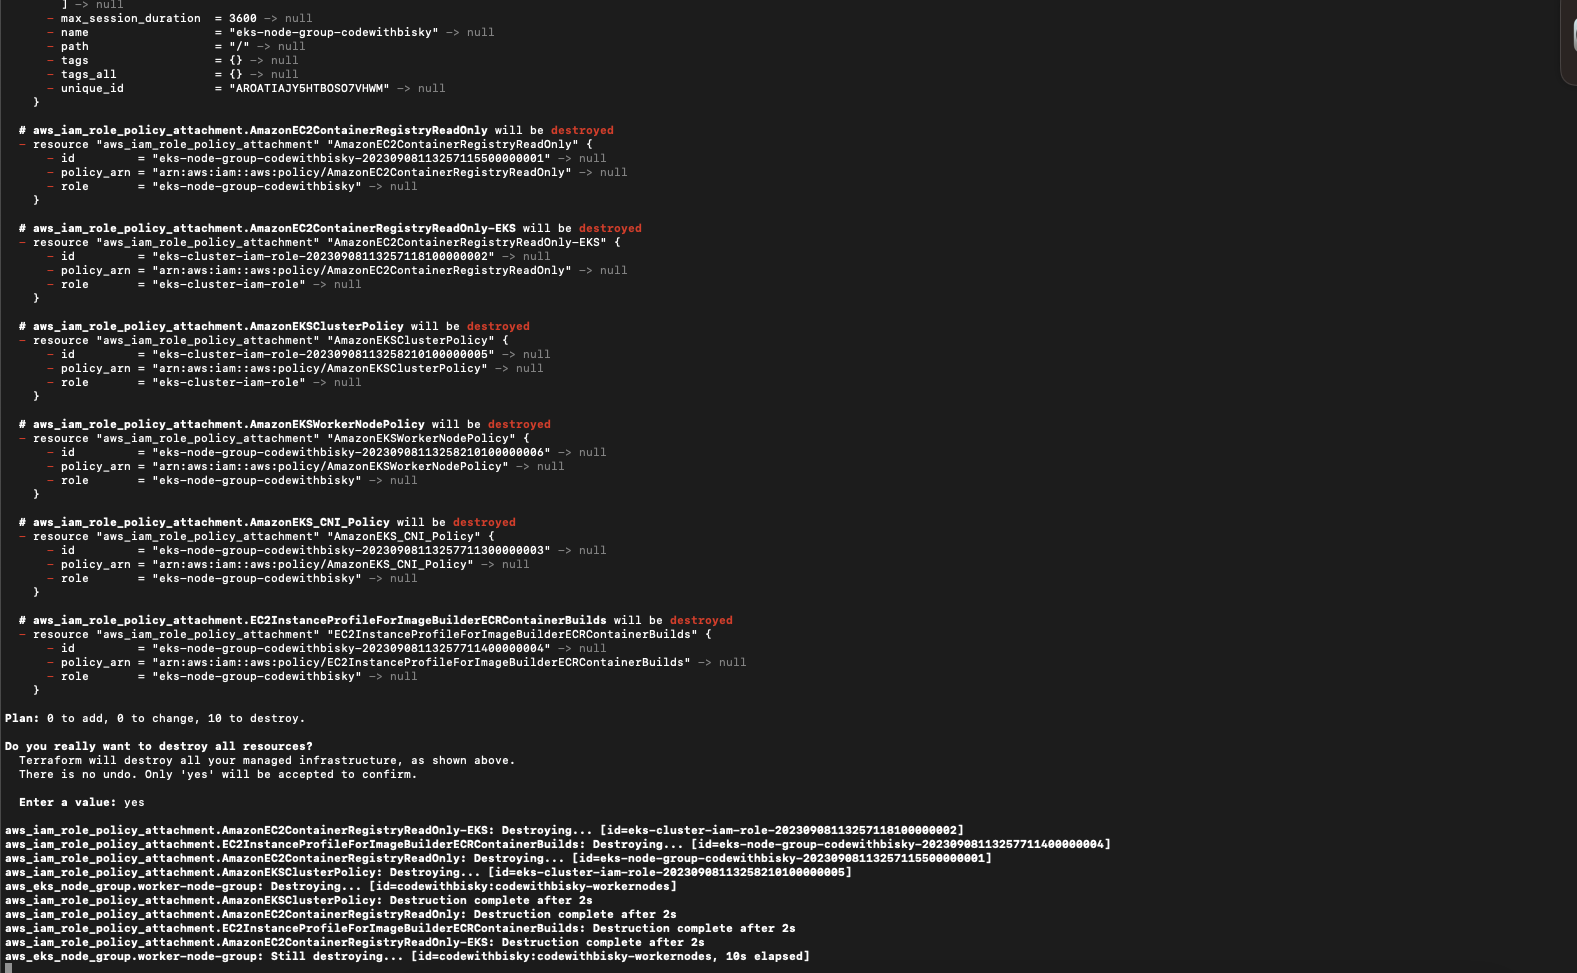
Fig 4.2 Terraform Destroy Progress
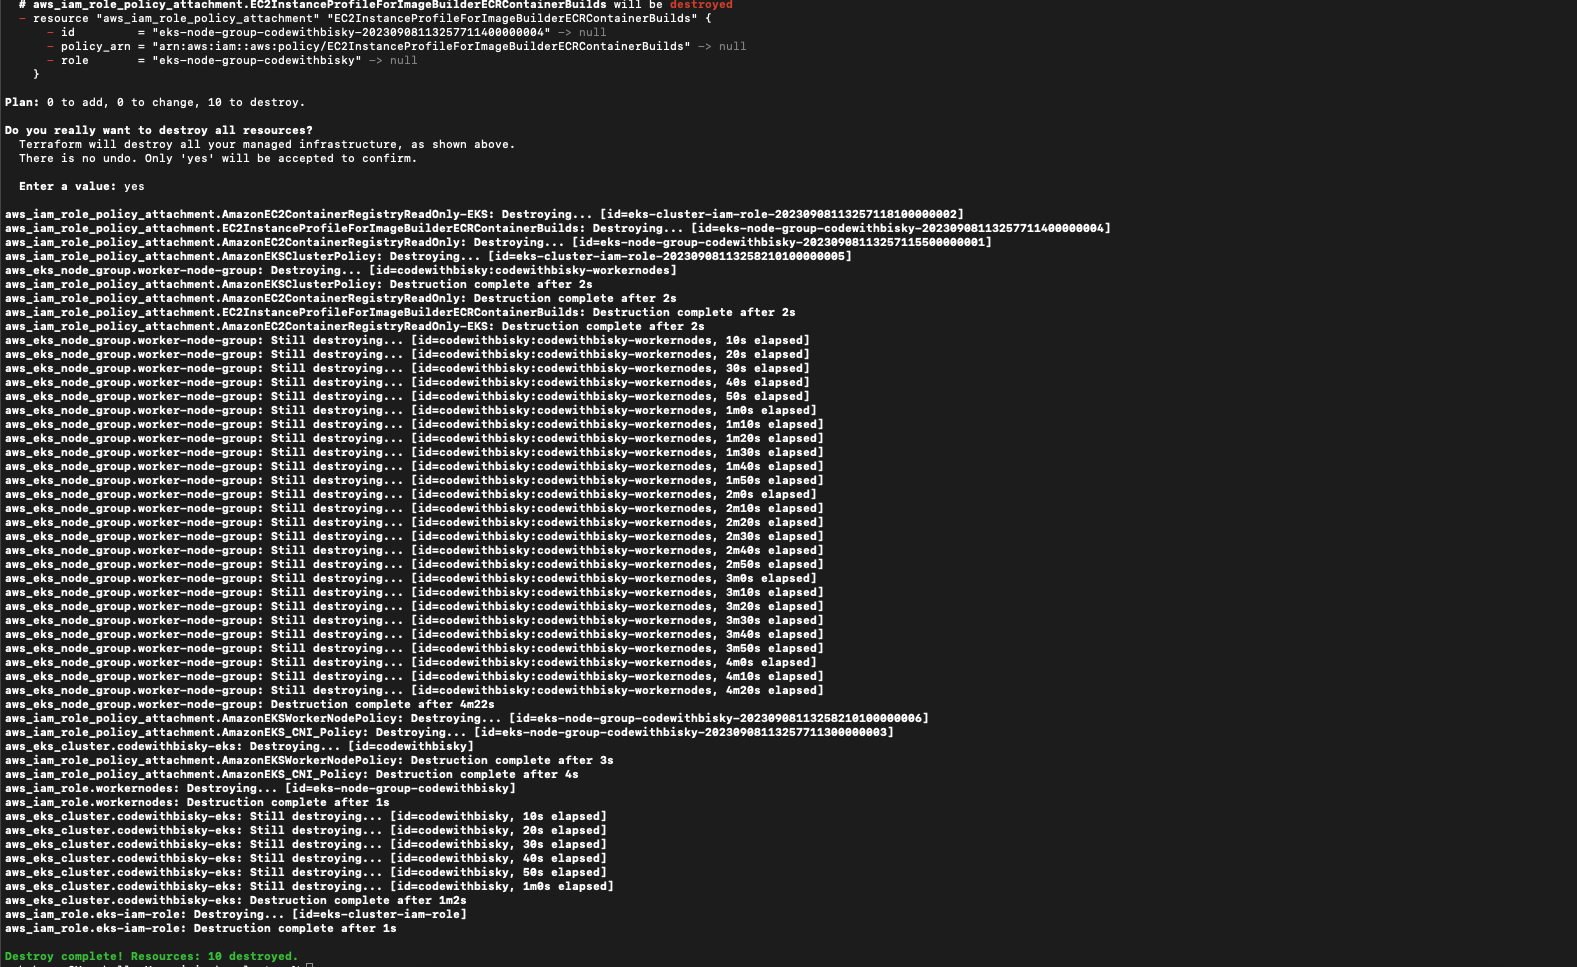
Fig 4.2 Terraform Destroy Complete
Conclusion:
We've successfully learned how to provision an AWS Elastic Kubernetes Service (EKS) cluster using Terraform. This Terraform configuration sets up an EKS cluster and associated resources with the necessary IAM roles and policies to manage and interact with the cluster. It also defines the worker nodes that will be part of the cluster
With EKS and Terraform in your toolkit, you have the power to deploy, scale, and orchestrate containerized workloads effortlessly. Whether you're a seasoned AWS pro or just getting started, mastering these technologies is a valuable skill that can propel your career in cloud computing and DevOps.
Remember, practice makes perfect. Don't hesitate to experiment and explore further. And if you have any questions or need assistance, feel free to reach out to our community