Spring Boot Keycloak Integration
Key Topics covered:
- Setting up Keycloak: Installation and configuration on your server
- Creating a realm and client for your Spring Boot app
- Adding Keycloak dependencies to your Spring Boot project
- Configuring application properties for Keycloak integration
- Securing endpoints using Spring Security and Keycloak roles
- Testing the integration: Logging in, accessing protected endpoints, and more
Description:
In this tutorial, we'll walk you through the process of integrating Keycloak, an open-source identity and access management solution, with a Spring Boot application for enhanced security and authentication. Keycloak provides features like Single Sign-On (SSO) and OAuth2 authorization, making it a powerful tool for managing user authentication and authorization.
1. Keycloak Configuration:
We need to run keycloak docker image using docker run command. That is the easiest way to set it up
docker run -p 9081:8080 -e KEYCLOAK_USER=admin -e KEYCLOAK_PASSWORD=password -e PROXY_ADDRESS_FORWARDING=true jboss/keycloak -Dkeycloak.profile.feature.docker=enabled -b 0.0.0.0
Replace codewithbisky.com with your domain name
Run keycloak with docker-compose. Create a docker-compose.yml file add the contents below in it
version: '3'
services:
    keycloak:
      image: jboss/keycloak
      ports:
        - "9081:8080"
      environment:
        - KEYCLOAK_USER=admin
        - KEYCLOAK_PASSWORD=password
        - PROXY_ADDRESS_FORWARDING=true
Run command docker-compose up -d
Let's access
https://keycloak.codewithbisky.com/
Add sub domain keycloak.codewithbisky.com server block
Run below command and add the server block in that file nano /etc/nginx/sites-available/keycloak.codewithbisky.com Press CTL+X and then type y to save and press enter
server {
    server_name  keycloak.codewithbisky.com;
    index index.html index.htm;
    access_log /var/log/nginx/keycloak-codewithbisky.log;
    error_log  /var/log/nginx/keycloak-codewithbisky-error.log error;
    client_max_body_size 100M;
    location / {
        proxy_set_header X-Forwarded-For $proxy_add_x_forwarded_for;
        proxy_set_header X-Forwarded-Proto $scheme;
        proxy_set_header X-Real-IP $remote_addr;
        proxy_set_header Host $http_host;
        proxy_pass http://127.0.0.1:9081;
        proxy_redirect off;
    }
}
Create the new subdomain on you DNS Management portal first and run below commands to restart nginx and to generate certificate
sudo ln -s /etc/nginx/sites-available/keycloak.codewithbisky.com /etc/nginx/sites-enabled/
sudo nginx -t
systemctl restart nginx
sudo certbot --nginx -d keycloak.codewithbisky.com
Keycloak Login Page can be accessed at https://keycloak.codewithbisky.com
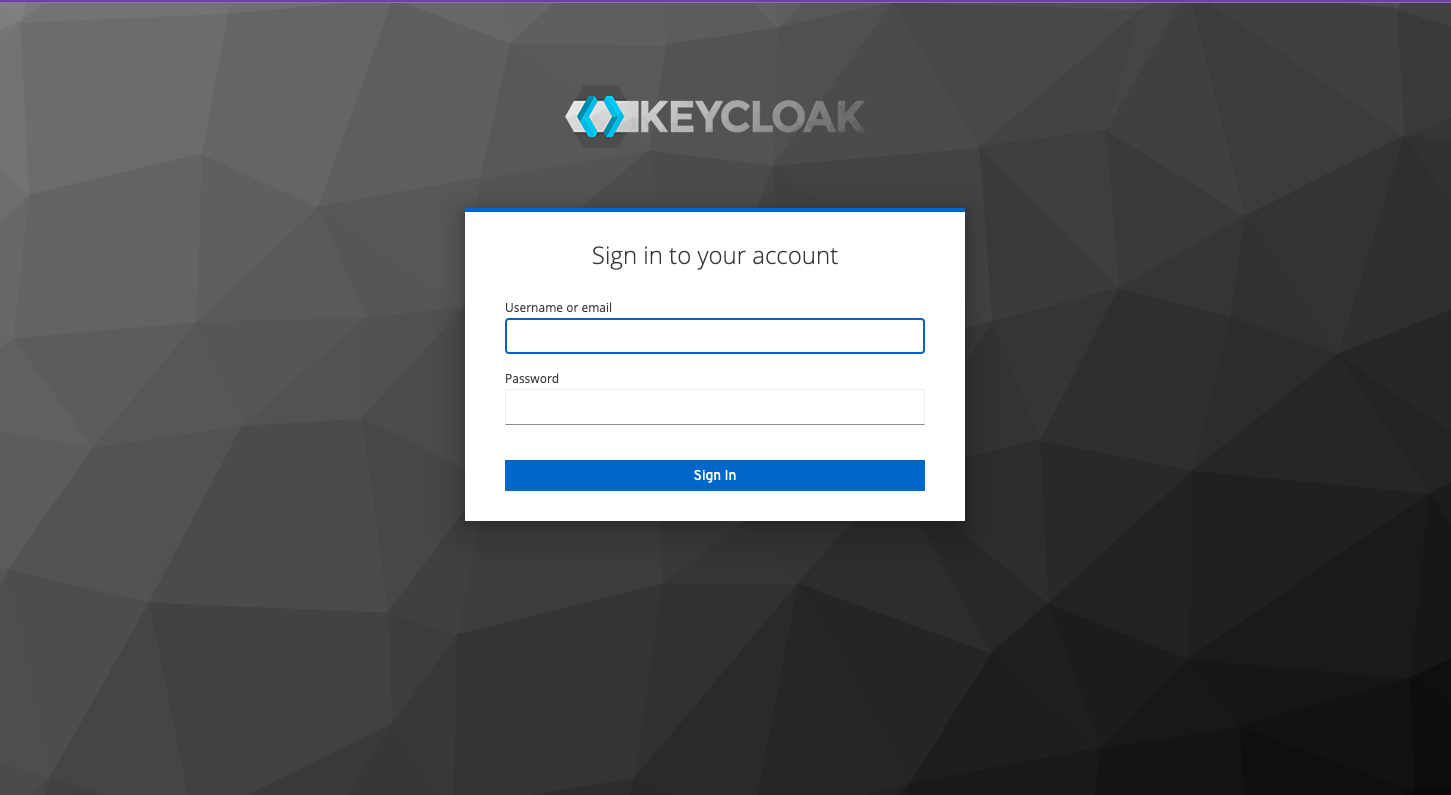
Keycloak Login Page
Login with username and password in the command docker run or in docker-compose.yml fileusername = admin & password = password
2. Realm Creation:
We need to create Realm. It is an object that manages users with their roles, credentials and groups also.
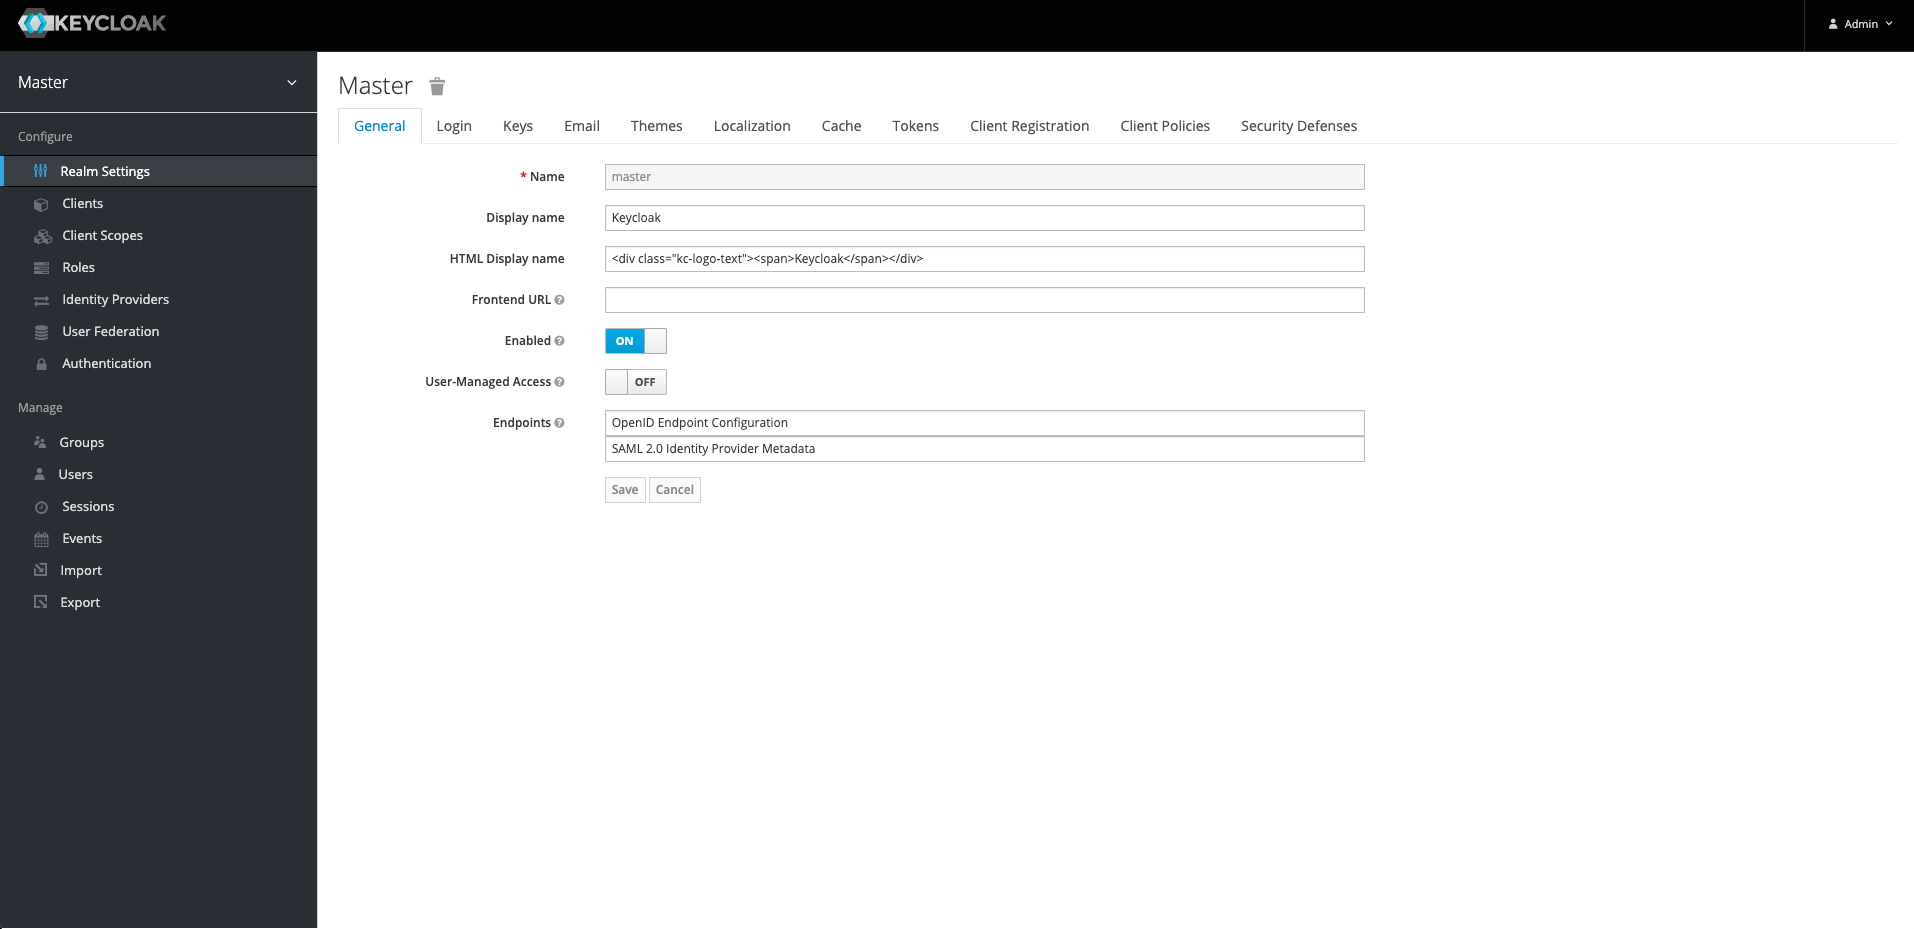
Hover your mouse on Master on top left corner and then click Add Realm button
Enter your Name e.g spring-boot-keycloak

Click buttonCreate A new realm will be created.
Enter your Name e.g Spring Boot Keycloak
Click buttonCreate A new realm will be created.
3. Create Client For Our Realm:
We need to new client authenticationClientId that we are going to use for a login request, although they are existing ones that we don't want to use for now . Select Client option on the left side bar
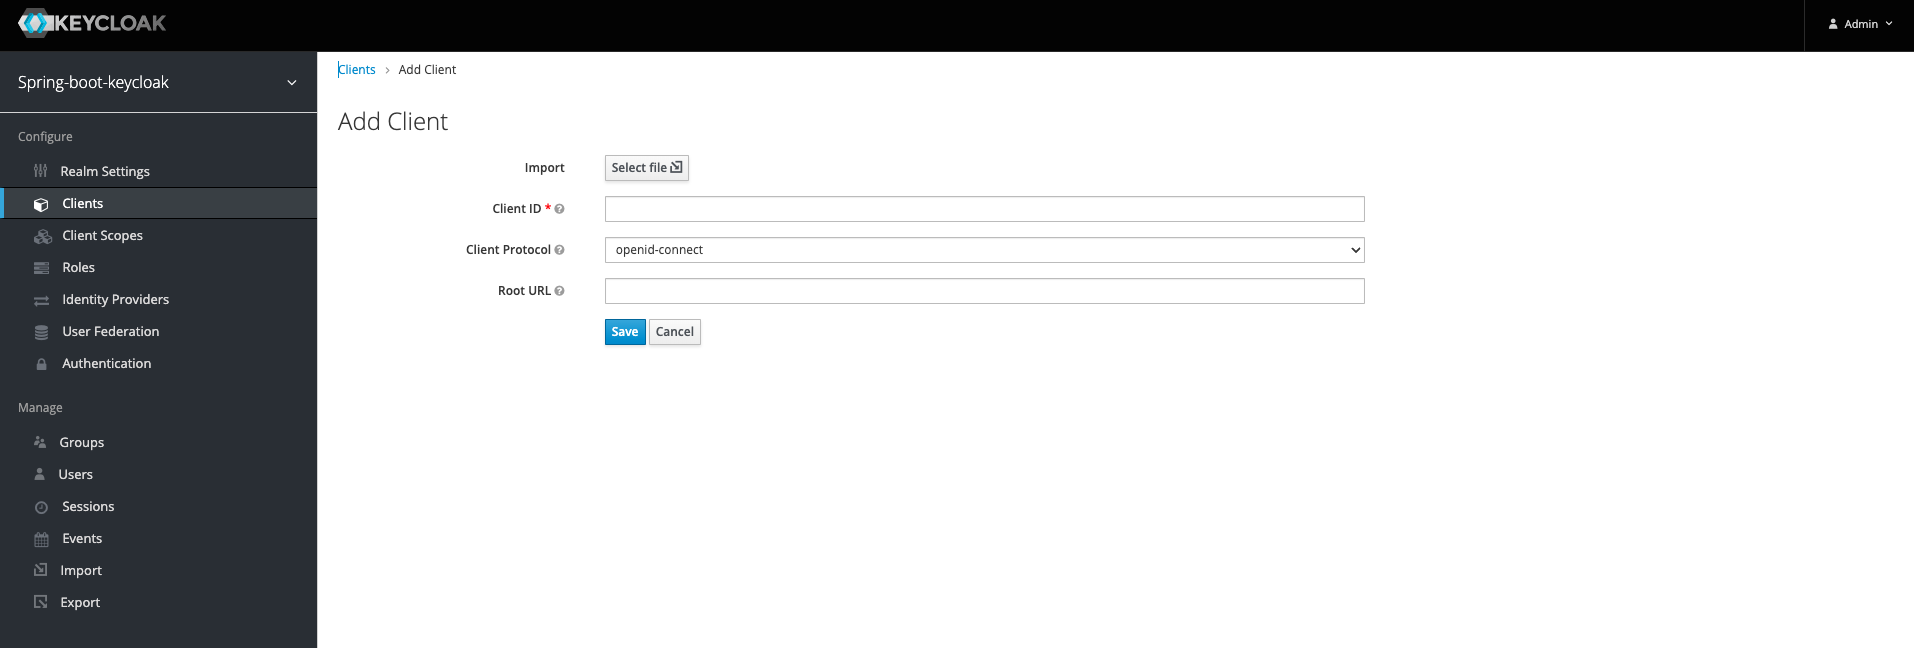
Click save and you will be navigated to the client page. Add your Valid Redirect URIs after user logged in or logged out. It will redirect the user to http://localhost:9095/* since our application is running on port 9095
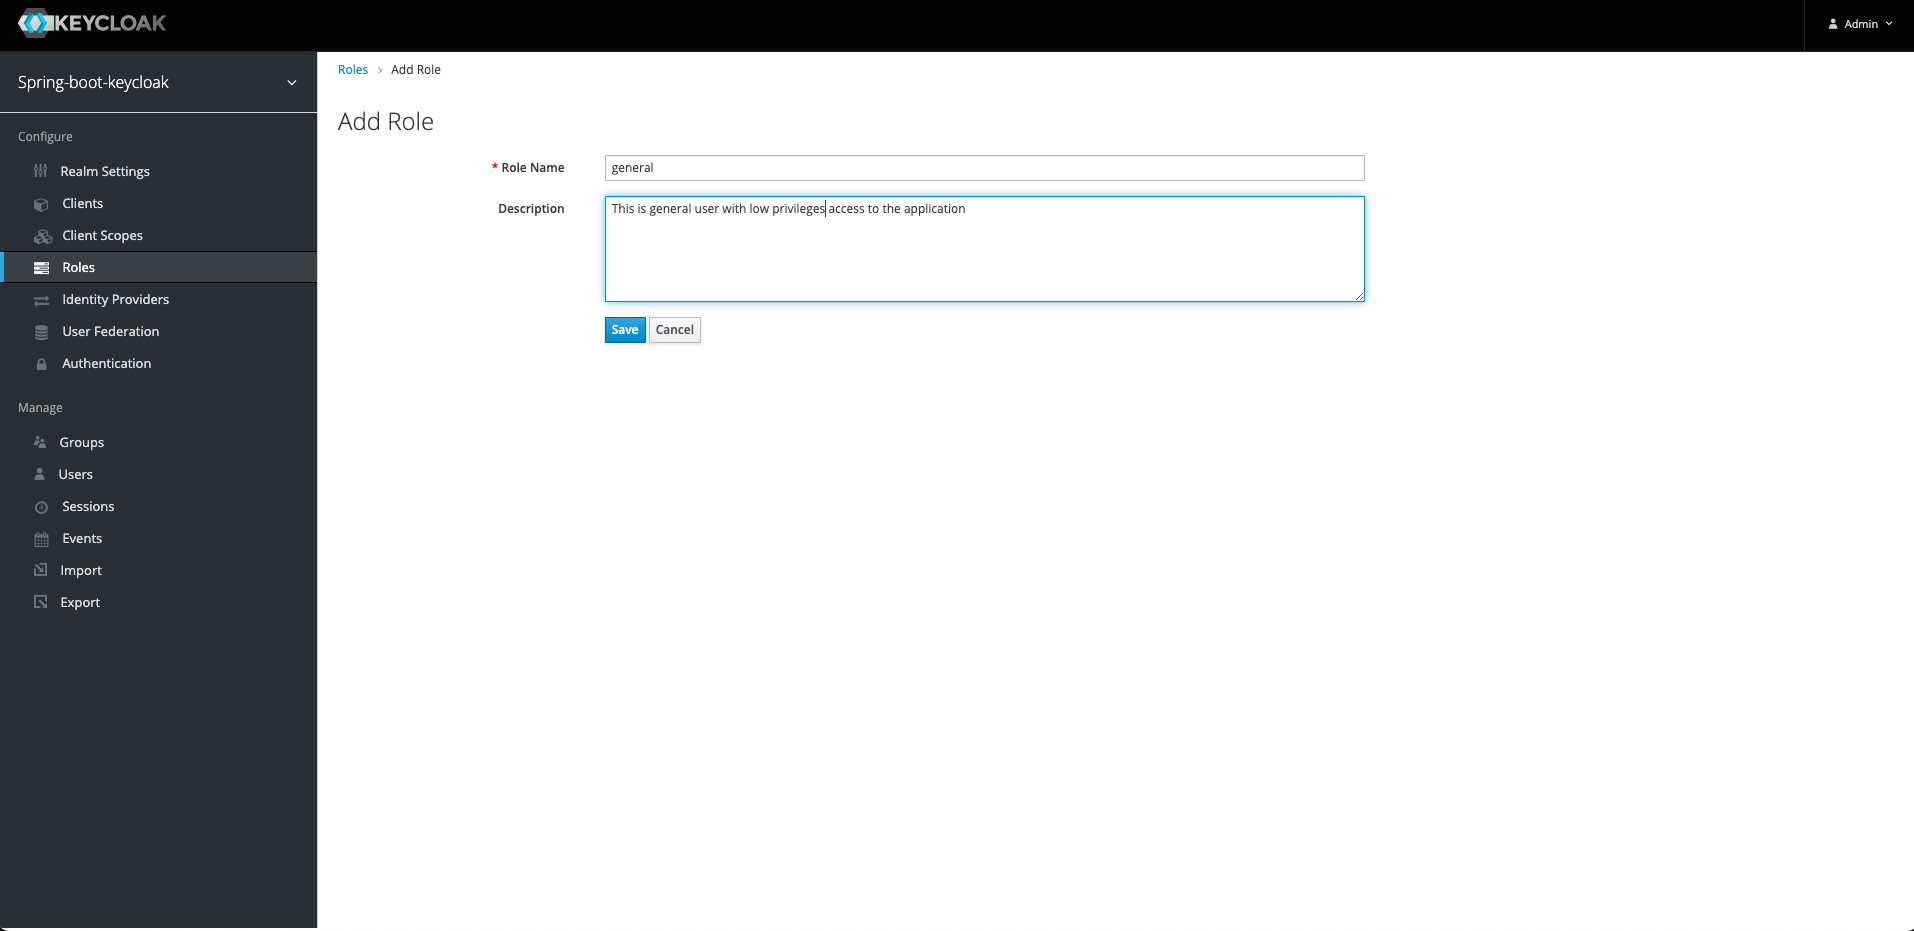
4. Create A Role:
Keycloak is a Role-based system per each user. We are going to create a new role and assign it to a user. Go to Roles section and click Add Role button on top right. Create a new role called general
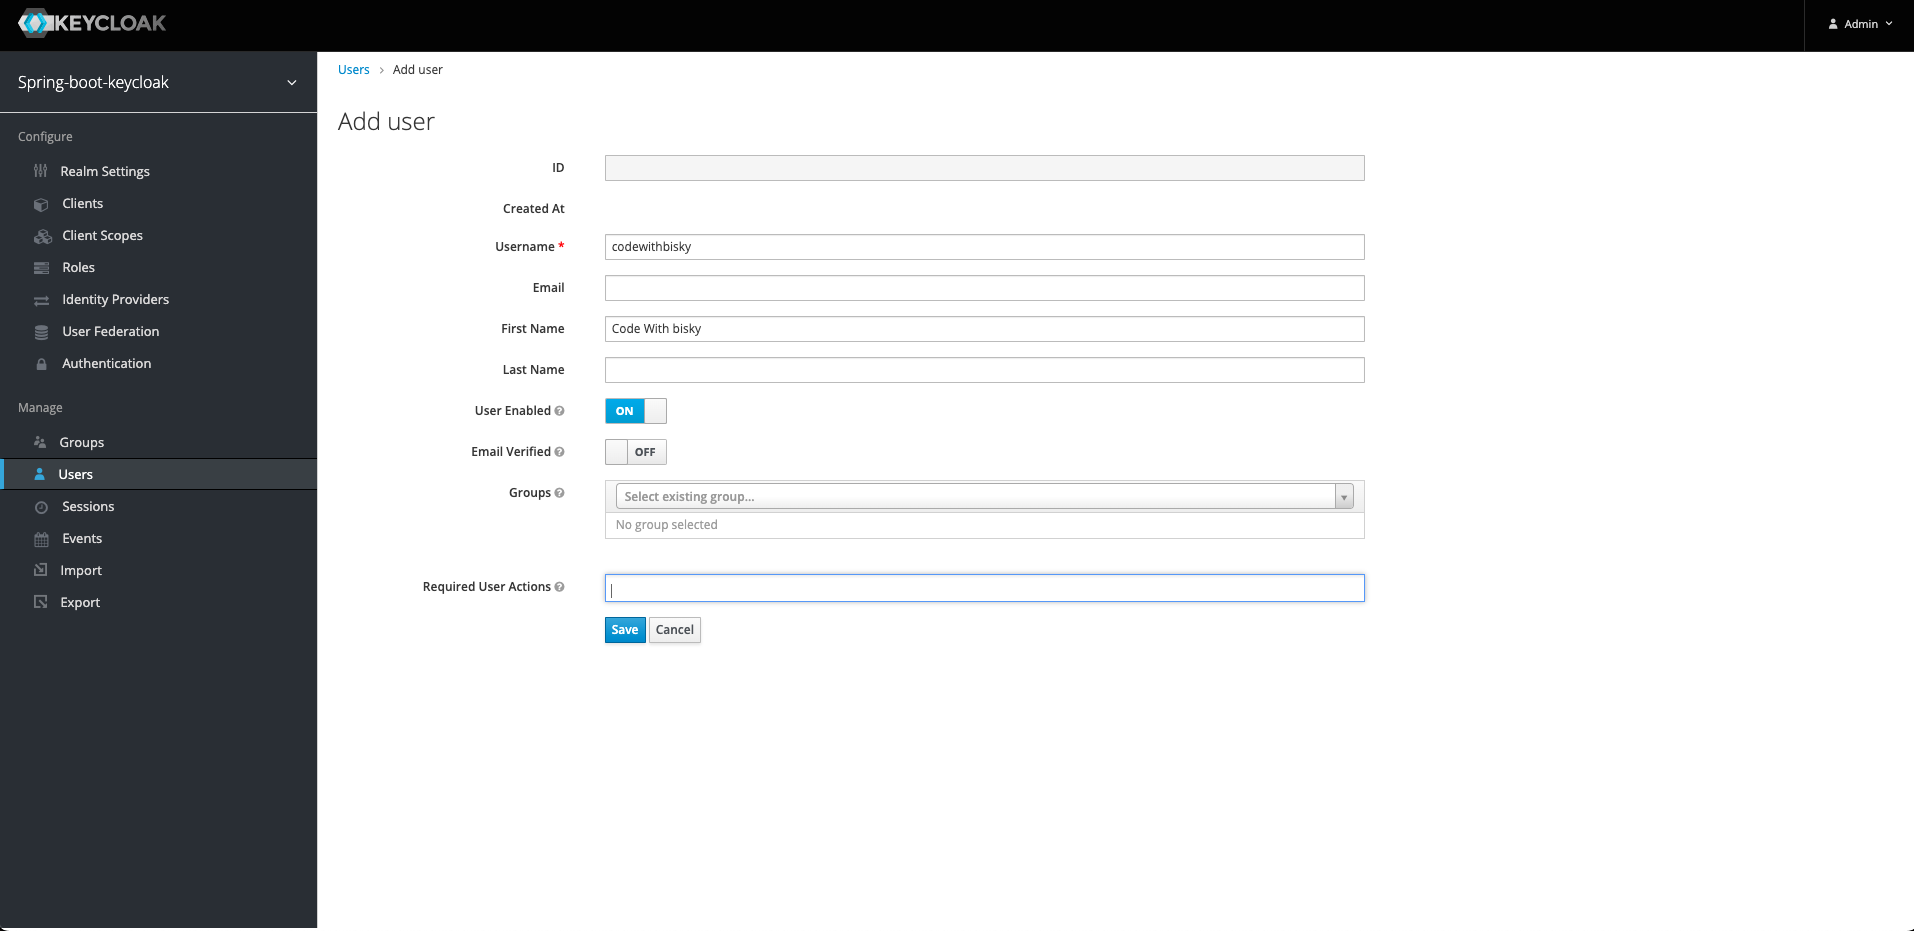
5. Create A User:
We are going to create a new user and assign a role we just created. We are going to create credentials for this user. Go to Users and Management section and add a New User
Go to Credentials Tab and Create password test1234
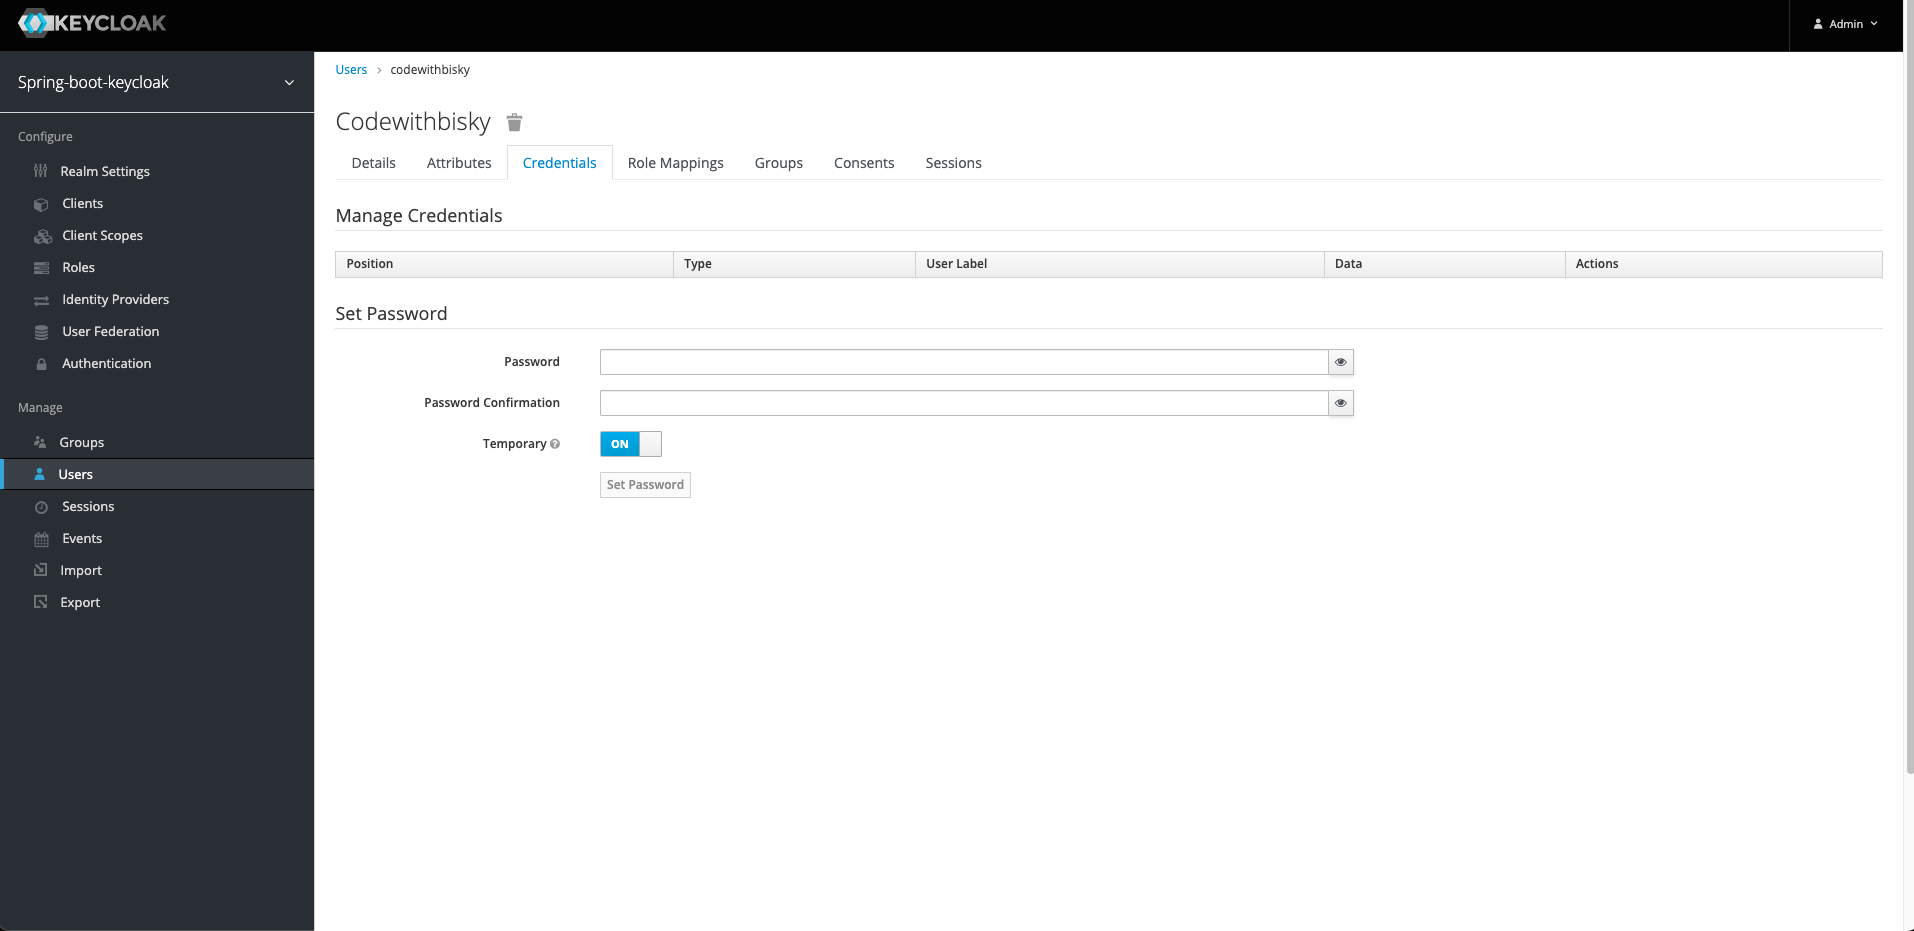
The Temporary is On and the user is allowed to change it for the first time login. Turn it OFF
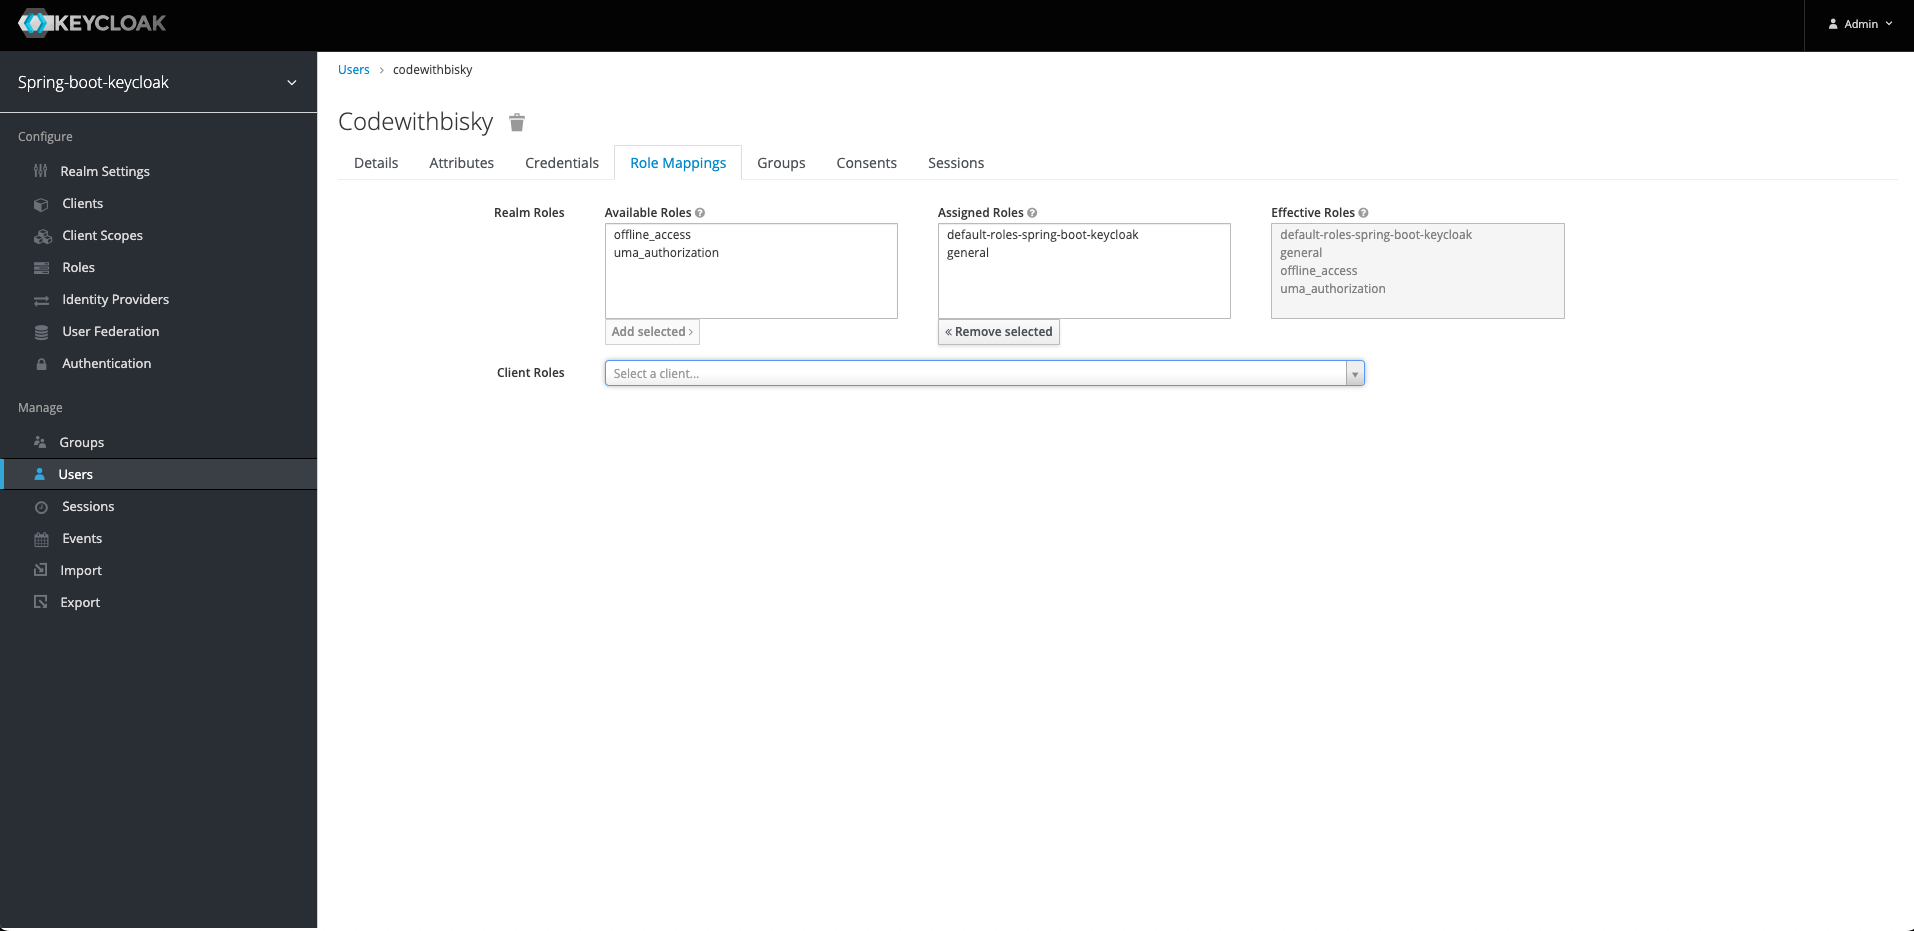
We need to assign a role to this user. Go to the Role Mappings Tab and assign the role we created general. Select the role general on Available Roles and click Add Selected
We have managed to configure our the Keycloak. We can generate authentication token
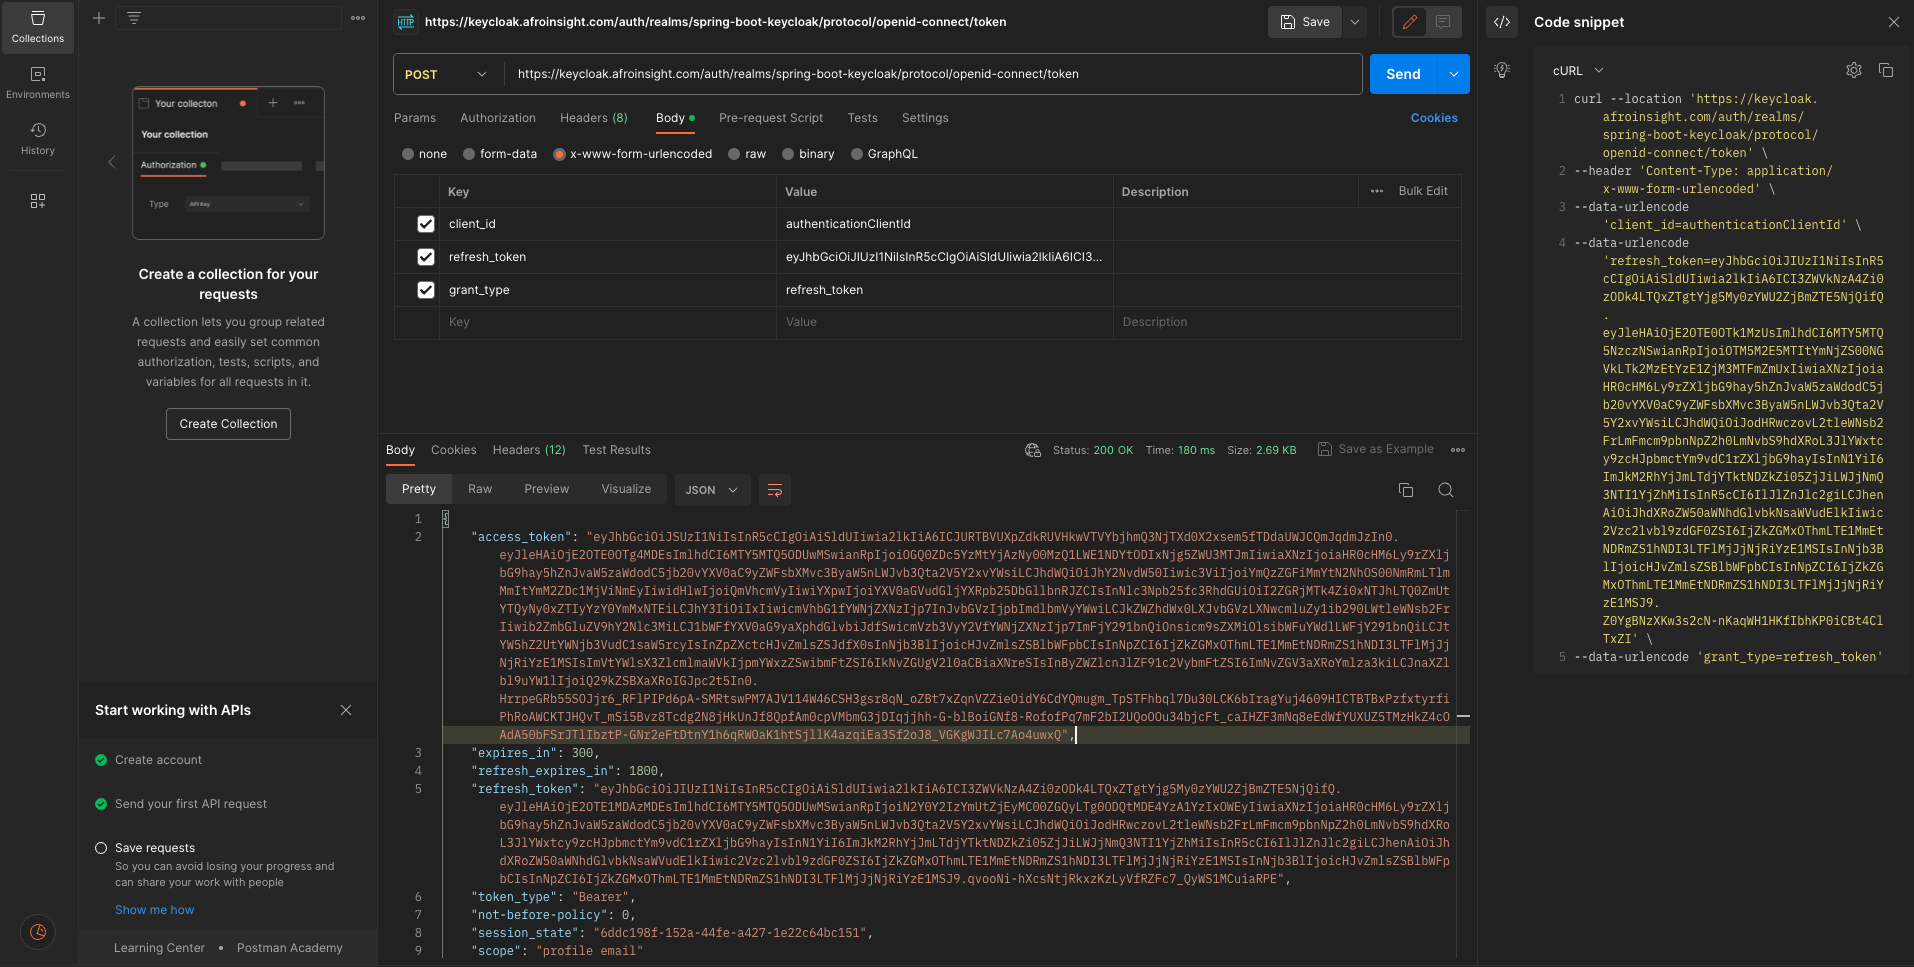
6. Generate Token:
Let's generate Authentication Token. Run the curl command on your terminal
curl --location 'https://keycloak.codewithbisky.com/auth/realms/spring-boot-keycloak/protocol/openid-connect/token' \
--header 'Content-Type: application/x-www-form-urlencoded' \
--data-urlencode 'client_id=authenticationClientId' \
--data-urlencode 'username=codewithbisky' \
--data-urlencode 'password=test1234' \
--data-urlencode 'grant_type=password'
You will get below response
{
    "access_token": "eyJhbGciOiJSUzI1NiIsInR5cCIgOiAiSldUIiwia2lkIiA6ICJURTBVUXpZdkRUVHkwVTVYbjhmQ3NjTXd0X2xsem5fTDdaUWJCQmJqdmJzIn0.eyJleHAiOjE2OTE0OTgwMzUsImlhdCI6MTY5MTQ5NzczNSwianRpIjoiMzVhZjQ1Y2EtMjI5NC00YjQyLTgyZTItOWVkZDJmODY3N2UzIiwiaXNzIjoiaHR0cHM6Ly9rZXljbG9hay5hZnJvaW5zaWdodC5jb20vYXV0aC9yZWFsbXMvc3ByaW5nLWJvb3Qta2V5Y2xvYWsiLCJhdWQiOiJhY2NvdW50Iiwic3ViIjoiYmQzZGFiMmYtN2NhOS00NmRmLTlmMmItYmM2ZDc1MjViNmEyIiwidHlwIjoiQmVhcmVyIiwiYXpwIjoiYXV0aGVudGljYXRpb25DbGllbnRJZCIsInNlc3Npb25fc3RhdGUiOiI2ZGRjMTk4Zi0xNTJhLTQ0ZmUtYTQyNy0xZTIyYzY0YmMxNTEiLCJhY3IiOiIxIiwicmVhbG1fYWNjZXNzIjp7InJvbGVzIjpbImdlbmVyYWwiLCJkZWZhdWx0LXJvbGVzLXNwcmluZy1ib290LWtleWNsb2FrIiwib2ZmbGluZV9hY2Nlc3MiLCJ1bWFfYXV0aG9yaXphdGlvbiJdfSwicmVzb3VyY2VfYWNjZXNzIjp7ImFjY291bnQiOnsicm9sZXMiOlsibWFuYWdlLWFjY291bnQiLCJtYW5hZ2UtYWNjb3VudC1saW5rcyIsInZpZXctcHJvZmlsZSJdfX0sInNjb3BlIjoicHJvZmlsZSBlbWFpbCIsInNpZCI6IjZkZGMxOThmLTE1MmEtNDRmZS1hNDI3LTFlMjJjNjRiYzE1MSIsImVtYWlsX3ZlcmlmaWVkIjpmYWxzZSwibmFtZSI6IkNvZGUgV2l0aCBiaXNreSIsInByZWZlcnJlZF91c2VybmFtZSI6ImNvZGV3aXRoYmlza3kiLCJnaXZlbl9uYW1lIjoiQ29kZSBXaXRoIGJpc2t5In0.Z96PAdBsJP7H_tTRDu1SMW8bXj3ILIhaqpv4jKCB5qXmu261tvGHDcJcV2f7GrvNQ82FWPjyoiAIeDrRBSRTSv18aq0KeAK8ZzdkVy9mt2XPFMflQijjv_JBhxFBrqGmYjU9s1N3KpFk2PvdrOh0Pmn5WBuUPrYRUgREI8vv33KsRUBHKfzbszCX9KRHLgouVam78HjpmNoEIr5eOwJfdTxFzIJQwkx3UHgMDh74JZXKMmrh8fhu6BxqoHgxrAwMnkg339b_uWscBKQM95UI6byJBqWetaD9CtvG3WkGV0OfzXhqwRPeobHRpCc5lUaCKkjIO2ZSJ_U9mRlDDP8yAw",
    "expires_in": 300,
    "refresh_expires_in": 1800,
    "refresh_token": "eyJhbGciOiJIUzI1NiIsInR5cCIgOiAiSldUIiwia2lkIiA6ICI3ZWVkNzA4Zi0zODk4LTQxZTgtYjg5My0zYWU2ZjBmZTE5NjQifQ.eyJleHAiOjE2OTE0OTk1MzUsImlhdCI6MTY5MTQ5NzczNSwianRpIjoiOTM5M2E5MTItYmNjZS00NGVkLTk2MzEtYzE1ZjM3MTFmZmUxIiwiaXNzIjoiaHR0cHM6Ly9rZXljbG9hay5hZnJvaW5zaWdodC5jb20vYXV0aC9yZWFsbXMvc3ByaW5nLWJvb3Qta2V5Y2xvYWsiLCJhdWQiOiJodHRwczovL2tleWNsb2FrLmFmcm9pbnNpZ2h0LmNvbS9hdXRoL3JlYWxtcy9zcHJpbmctYm9vdC1rZXljbG9hayIsInN1YiI6ImJkM2RhYjJmLTdjYTktNDZkZi05ZjJiLWJjNmQ3NTI1YjZhMiIsInR5cCI6IlJlZnJlc2giLCJhenAiOiJhdXRoZW50aWNhdGlvbkNsaWVudElkIiwic2Vzc2lvbl9zdGF0ZSI6IjZkZGMxOThmLTE1MmEtNDRmZS1hNDI3LTFlMjJjNjRiYzE1MSIsInNjb3BlIjoicHJvZmlsZSBlbWFpbCIsInNpZCI6IjZkZGMxOThmLTE1MmEtNDRmZS1hNDI3LTFlMjJjNjRiYzE1MSJ9.Z0YgBNzXKw3s2cN-nKaqWH1HKfIbhKP0iCBt4ClTxZI",
    "token_type": "Bearer",
    "not-before-policy": 0,
    "session_state": "6ddc198f-152a-44fe-a427-1e22c64bc151",
    "scope": "profile email"
}

You can access secure endpoints with the access token. Once the token expired you can get a new token with refresh grant type and refresh access token
Generate new token with refresh token
curl --location 'https://keycloak.codewithbisky.com/auth/realms/spring-boot-keycloak/protocol/openid-connect/token' \
--header 'Content-Type: application/x-www-form-urlencoded' \
--data-urlencode 'client_id=authenticationClientId' \
--data-urlencode 'refresh_token=eyJhbGciOiJIUzI1NiIsInR5cCIgOiAiSldUIiwia2lkIiA6ICI3ZWVkNzA4Zi0zODk4LTQxZTgtYjg5My0zYWU2ZjBmZTE5NjQifQ.eyJleHAiOjE2OTE0OTk1MzUsImlhdCI6MTY5MTQ5NzczNSwianRpIjoiOTM5M2E5MTItYmNjZS00NGVkLTk2MzEtYzE1ZjM3MTFmZmUxIiwiaXNzIjoiaHR0cHM6Ly9rZXljbG9hay5hZnJvaW5zaWdodC5jb20vYXV0aC9yZWFsbXMvc3ByaW5nLWJvb3Qta2V5Y2xvYWsiLCJhdWQiOiJodHRwczovL2tleWNsb2FrLmFmcm9pbnNpZ2h0LmNvbS9hdXRoL3JlYWxtcy9zcHJpbmctYm9vdC1rZXljbG9hayIsInN1YiI6ImJkM2RhYjJmLTdjYTktNDZkZi05ZjJiLWJjNmQ3NTI1YjZhMiIsInR5cCI6IlJlZnJlc2giLCJhenAiOiJhdXRoZW50aWNhdGlvbkNsaWVudElkIiwic2Vzc2lvbl9zdGF0ZSI6IjZkZGMxOThmLTE1MmEtNDRmZS1hNDI3LTFlMjJjNjRiYzE1MSIsInNjb3BlIjoicHJvZmlsZSBlbWFpbCIsInNpZCI6IjZkZGMxOThmLTE1MmEtNDRmZS1hNDI3LTFlMjJjNjRiYzE1MSJ9.Z0YgBNzXKw3s2cN-nKaqWH1HKfIbhKP0iCBt4ClTxZI' \
--data-urlencode 'grant_type=refresh_token'
You will get below response
{
    "access_token": "eyJhbGciOiJSUzI1NiIsInR5cCIgOiAiSldUIiwia2lkIiA6ICJURTBVUXpZdkRUVHkwVTVYbjhmQ3NjTXd0X2xsem5fTDdaUWJCQmJqdmJzIn0.eyJleHAiOjE2OTE0OTg4MDEsImlhdCI6MTY5MTQ5ODUwMSwianRpIjoiOGQ0ZDc5YzMtYjAzNy00MzQ1LWE1NDYtODIxNjg5ZWU3MTJmIiwiaXNzIjoiaHR0cHM6Ly9rZXljbG9hay5hZnJvaW5zaWdodC5jb20vYXV0aC9yZWFsbXMvc3ByaW5nLWJvb3Qta2V5Y2xvYWsiLCJhdWQiOiJhY2NvdW50Iiwic3ViIjoiYmQzZGFiMmYtN2NhOS00NmRmLTlmMmItYmM2ZDc1MjViNmEyIiwidHlwIjoiQmVhcmVyIiwiYXpwIjoiYXV0aGVudGljYXRpb25DbGllbnRJZCIsInNlc3Npb25fc3RhdGUiOiI2ZGRjMTk4Zi0xNTJhLTQ0ZmUtYTQyNy0xZTIyYzY0YmMxNTEiLCJhY3IiOiIxIiwicmVhbG1fYWNjZXNzIjp7InJvbGVzIjpbImdlbmVyYWwiLCJkZWZhdWx0LXJvbGVzLXNwcmluZy1ib290LWtleWNsb2FrIiwib2ZmbGluZV9hY2Nlc3MiLCJ1bWFfYXV0aG9yaXphdGlvbiJdfSwicmVzb3VyY2VfYWNjZXNzIjp7ImFjY291bnQiOnsicm9sZXMiOlsibWFuYWdlLWFjY291bnQiLCJtYW5hZ2UtYWNjb3VudC1saW5rcyIsInZpZXctcHJvZmlsZSJdfX0sInNjb3BlIjoicHJvZmlsZSBlbWFpbCIsInNpZCI6IjZkZGMxOThmLTE1MmEtNDRmZS1hNDI3LTFlMjJjNjRiYzE1MSIsImVtYWlsX3ZlcmlmaWVkIjpmYWxzZSwibmFtZSI6IkNvZGUgV2l0aCBiaXNreSIsInByZWZlcnJlZF91c2VybmFtZSI6ImNvZGV3aXRoYmlza3kiLCJnaXZlbl9uYW1lIjoiQ29kZSBXaXRoIGJpc2t5In0.HrrpeGRb55SOJjr6_RFlPIPd6pA-SMRtswPM7AJV114W46CSH3gsr8qN_oZBt7xZqnVZZieOidY6CdYQmugm_TpSTFhbql7Du30LCK6bIragYuj4609HICTBTBxPzfxtyrfiPhRoAWCKTJHQvT_mSi5Bvz8Tcdg2N8jHkUnJf8QpfAm0cpVMbmG3jDIqjjhh-G-blBoiGNf8-RofofPq7mF2bI2UQoOOu34bjcFt_caIHZF3mNq8eEdWfYUXUZ5TMzHkZ4cOAdA50bFSrJTlIbztP-GNr2eFtDtnY1h6qRWOaK1htSjllK4azqiEa3Sf2oJ8_VGKgWJILc7Ao4uwxQ",
    "expires_in": 300,
    "refresh_expires_in": 1800,
    "refresh_token": "eyJhbGciOiJIUzI1NiIsInR5cCIgOiAiSldUIiwia2lkIiA6ICI3ZWVkNzA4Zi0zODk4LTQxZTgtYjg5My0zYWU2ZjBmZTE5NjQifQ.eyJleHAiOjE2OTE1MDAzMDEsImlhdCI6MTY5MTQ5ODUwMSwianRpIjoiN2Y0Y2IzYmUtZjEyMC00ZGQyLTg0ODQtMDE4YzA1YzIxOWEyIiwiaXNzIjoiaHR0cHM6Ly9rZXljbG9hay5hZnJvaW5zaWdodC5jb20vYXV0aC9yZWFsbXMvc3ByaW5nLWJvb3Qta2V5Y2xvYWsiLCJhdWQiOiJodHRwczovL2tleWNsb2FrLmFmcm9pbnNpZ2h0LmNvbS9hdXRoL3JlYWxtcy9zcHJpbmctYm9vdC1rZXljbG9hayIsInN1YiI6ImJkM2RhYjJmLTdjYTktNDZkZi05ZjJiLWJjNmQ3NTI1YjZhMiIsInR5cCI6IlJlZnJlc2giLCJhenAiOiJhdXRoZW50aWNhdGlvbkNsaWVudElkIiwic2Vzc2lvbl9zdGF0ZSI6IjZkZGMxOThmLTE1MmEtNDRmZS1hNDI3LTFlMjJjNjRiYzE1MSIsInNjb3BlIjoicHJvZmlsZSBlbWFpbCIsInNpZCI6IjZkZGMxOThmLTE1MmEtNDRmZS1hNDI3LTFlMjJjNjRiYzE1MSJ9.qvooNi-hXcsNtjRkxzKzLyVfRZFc7_QyWS1MCuiaRPE",
    "token_type": "Bearer",
    "not-before-policy": 0,
    "session_state": "6ddc198f-152a-44fe-a427-1e22c64bc151",
    "scope": "profile email"
}
You can access secure endpoints with the new access token.
7. Keycloak Spring Boot Integration:
We need to add keycloak dependency in our project
<dependency>
    <groupId>org.springframework.boot</groupId>
    <artifactId>spring-boot-starter-security</artifactId>
</dependency>
<dependency>
    <groupId>org.springframework.boot</groupId>
    <artifactId>spring-boot-starter-oauth2-resource-server</artifactId>
</dependency>
<dependency>
    <groupId>org.springframework.boot</groupId>
    <artifactId>spring-boot-configuration-processor</artifactId>
    <optional>true</optional>
</dependency>
We need to add security configuration into application.yml file. Add resourceserver jwt uri of the keycloak server we configured. With this config we can have Single Sign On our microservices. The resource-id is the client we configured above.
spring:
  profile:
    active: production
  security:
    oauth2:
      resourceserver:
        jwt:
          issuer-uri: https://keycloak.codewithbisky.com/auth/realms/spring-boot-keycloak
jwt:
  auth:
    converter:
      resource-id: authenticationClientId
Let's create a class JwtAuthConverter. We are going to extract roles from the JWT and validate resource
package com.code.with.bisky.config.security;

import org.springframework.beans.factory.annotation.Value;
import org.springframework.core.convert.converter.Converter;
import org.springframework.security.authentication.AbstractAuthenticationToken;
import org.springframework.security.core.GrantedAuthority;
import org.springframework.security.core.authority.SimpleGrantedAuthority;
import org.springframework.security.oauth2.jwt.Jwt;
import org.springframework.security.oauth2.jwt.JwtClaimNames;
import org.springframework.security.oauth2.server.resource.authentication.JwtAuthenticationToken;
import org.springframework.security.oauth2.server.resource.authentication.JwtGrantedAuthoritiesConverter;
import org.springframework.stereotype.Component;

import java.util.*;
import java.util.stream.Collectors;
import java.util.stream.Stream;

@Component
public class JwtAuthConverter implements Converter<Jwt, AbstractAuthenticationToken> {

    private final JwtGrantedAuthoritiesConverter jwtGrantedAuthoritiesConverter = new JwtGrantedAuthoritiesConverter();

    @Value("${jwt.auth.converter.resource-id}")
    private String resourceId;


    @Override
    public AbstractAuthenticationToken convert(Jwt jwt) {
        Collection<GrantedAuthority> authorities = Stream.concat(
                jwtGrantedAuthoritiesConverter.convert(jwt).stream(),
                extractResourceRoles(jwt).stream()).collect(Collectors.toSet());
        return new JwtAuthenticationToken(jwt, authorities, getPrincipalClaimName(jwt));
    }

    private String getPrincipalClaimName(Jwt jwt) {
        String claimName = JwtClaimNames.SUB;
        return jwt.getClaim(claimName);
    }

    private Collection<? extends GrantedAuthority> extractResourceRoles(Jwt jwt) {

        Map<String, Object> realmAccess = jwt.getClaim("realm_access");
        Map<String, Object> resourceAccess = jwt.getClaim("resource_access");

        Collection<String> allRoles = new ArrayList<>();
        Collection<String> resourceRoles;
        Collection<String> realmRoles ;

        if(resourceAccess != null && resourceAccess.get("account") != null){
            Map<String,Object> account =  (Map<String,Object>) resourceAccess.get("account");
            if(account.containsKey("roles") ){
                resourceRoles = (Collection<String>) account.get("roles");
                allRoles.addAll(resourceRoles);
            }
        }

        if(realmAccess != null && realmAccess.containsKey("roles")){
            realmRoles = (Collection<String>) realmAccess.get("roles");
            allRoles.addAll(realmRoles);
        }
        if (allRoles.isEmpty() || !Objects.equals(resourceId,jwt.getClaim("azp")) ) {

            return Set.of();
        }

        return allRoles.stream()
                .map(role -> new SimpleGrantedAuthority("ROLE_" + role))
                .collect(Collectors.toSet());
    }
}
Let's create a class WebSecurityConfig. We want to permit some of the URL's to be accessed without security such as swagger api
package com.code.with.bisky.config.security;
import lombok.RequiredArgsConstructor;
import org.springframework.context.annotation.Bean;
import org.springframework.context.annotation.Configuration;
import org.springframework.http.HttpMethod;
import org.springframework.security.config.annotation.web.builders.HttpSecurity;
import org.springframework.security.config.annotation.web.configuration.EnableWebSecurity;
import org.springframework.security.config.annotation.web.configuration.WebSecurityCustomizer;
import org.springframework.security.config.http.SessionCreationPolicy;
import org.springframework.security.web.SecurityFilterChain;

@RequiredArgsConstructor
@Configuration
@EnableWebSecurity
public class WebSecurityConfig {

    public static final String ADMIN = "admin";
    public static final String USER = "general";
    private final JwtAuthConverter jwtAuthConverter;


    @Bean
    public SecurityFilterChain securityFilterChain(HttpSecurity httpSecurity) throws Exception {


        return httpSecurity
                .authorizeHttpRequests(auth -> auth
                        .requestMatchers(HttpMethod.GET, "/test/anonymous", "/test/anonymous/**").permitAll()
                        .requestMatchers(HttpMethod.GET, "/test/admin", "/test/admin/**").hasRole(ADMIN)
                        .requestMatchers(HttpMethod.GET, "/test/user").hasAnyRole(ADMIN, USER)
                        .anyRequest().authenticated()
                )
                .oauth2ResourceServer(oauth2 -> oauth2
                        .jwt(jwt -> jwt
                                .jwtAuthenticationConverter(jwtAuthConverter)
                        )
                )
                .sessionManagement(sess -> sess.sessionCreationPolicy(SessionCreationPolicy.STATELESS))
                .build();
    }

    @Bean
    public WebSecurityCustomizer webSecurityCustomizer() {

        return (web) -> {
            web.ignoring().requestMatchers(
                    HttpMethod.POST,
                    "/public/**"
            );
            web.ignoring().requestMatchers(
                    HttpMethod.GET,
                    "/public/**"
            );
            web.ignoring().requestMatchers(
                    HttpMethod.DELETE,
                    "/public/**"
            );
            web.ignoring().requestMatchers(
                    HttpMethod.PUT,
                    "/public/**"
            );
            web.ignoring().requestMatchers(
                            HttpMethod.OPTIONS,
                            "/**"
                    )
                    .requestMatchers("/v3/api-docs/**", "/configuration/**", "/swagger-ui/**",
                            "/swagger-resources/**", "/swagger-ui.html", "/webjars/**", "/api-docs/**");

        };
    }

}
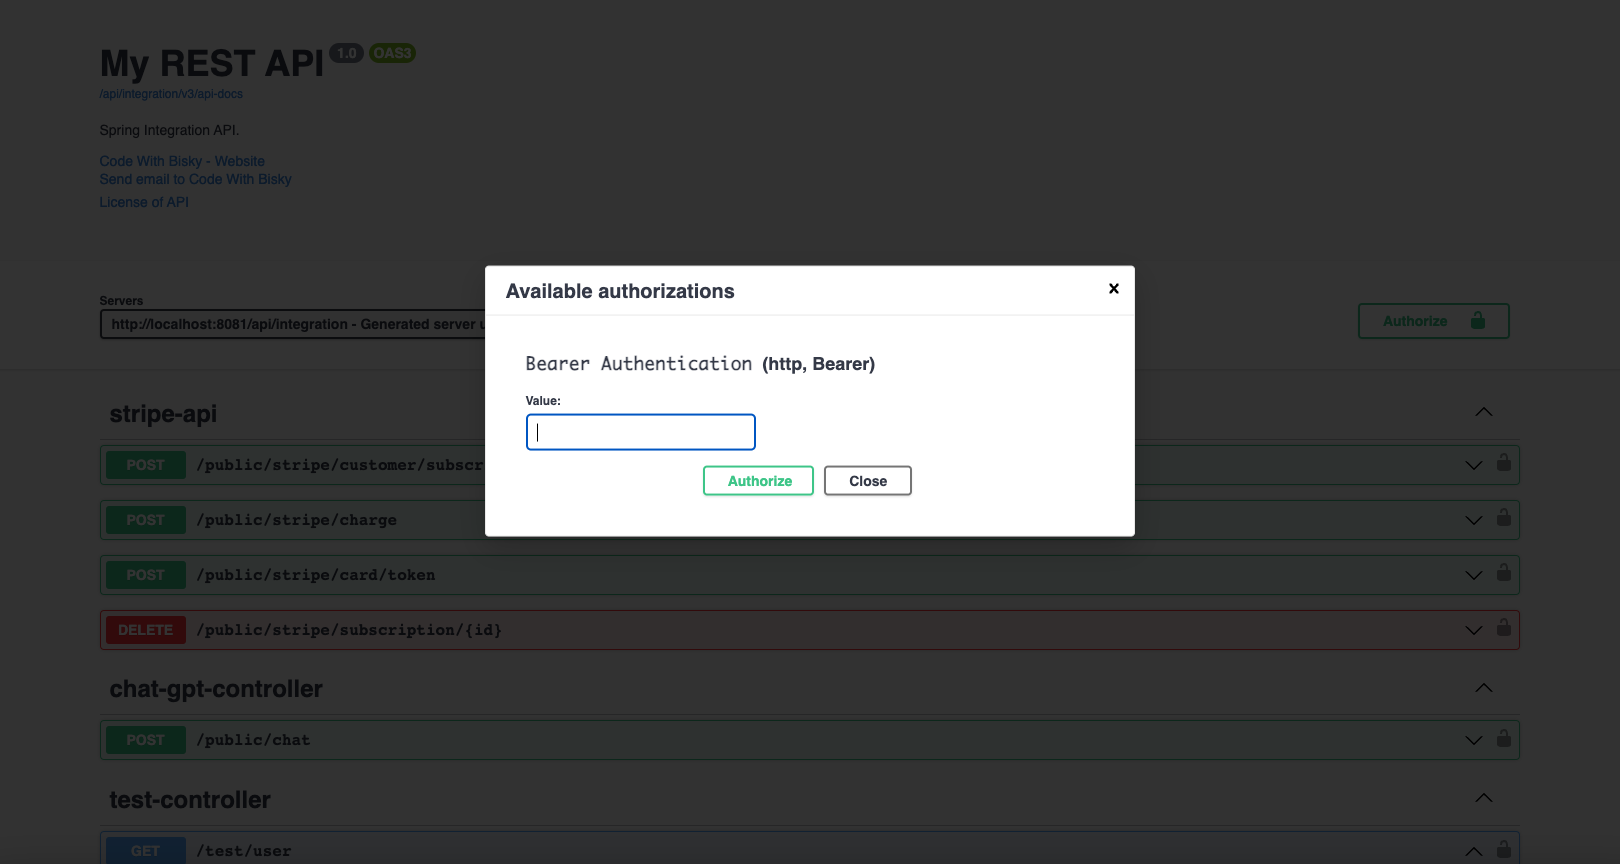
Let's create a class SwaggerCustomConfig. We want to configure it to show Authorization Dialog to put Bearer Token
package com.code.with.bisky.config;

import io.swagger.v3.oas.models.Components;
import io.swagger.v3.oas.models.OpenAPI;
import io.swagger.v3.oas.models.info.Contact;
import io.swagger.v3.oas.models.info.Info;
import io.swagger.v3.oas.models.info.License;
import io.swagger.v3.oas.models.security.SecurityRequirement;
import io.swagger.v3.oas.models.security.SecurityScheme;
import org.springframework.context.annotation.Bean;
import org.springframework.context.annotation.Configuration;

@Configuration
public class SwaggerCustomConfig {

    private SecurityScheme createAPIKeyScheme() {
        return new SecurityScheme().type(SecurityScheme.Type.HTTP)
                .bearerFormat("JWT")
                .scheme("bearer");
    }

    @Bean
    public OpenAPI openAPI() {
        return new OpenAPI().addSecurityItem(new SecurityRequirement().
                        addList("Bearer Authentication"))
                .components(new Components().addSecuritySchemes
                        ("Bearer Authentication", createAPIKeyScheme()))
                .info(new Info().title("My REST API")
                        .description("Spring Integration API.")
                        .version("1.0").contact(new Contact().name("Code With Bisky")
                                .email( "www.codewithbisky.com").url("codewithbisky@gmail.com"))
                        .license(new License().name("License of API")
                                .url("API license URL")));
    }
}
Let's create a class TestController. We want to create few apis that we can use to test our security
package com.code.with.bisky.api.security;

import org.springframework.http.ResponseEntity;
import org.springframework.security.oauth2.server.resource.authentication.JwtAuthenticationToken;
import org.springframework.web.bind.annotation.GetMapping;
import org.springframework.web.bind.annotation.RequestMapping;
import org.springframework.web.bind.annotation.RestController;

import java.security.Principal;

@RestController
@RequestMapping("/test")
public class TestController {

    @GetMapping("/anonymous")
    public ResponseEntity<String> getAnonymous() {
        return ResponseEntity.ok("Hello Anonymous");
    }

    @GetMapping("/admin")
    public ResponseEntity<String> getAdmin(Principal principal) {
        JwtAuthenticationToken token = (JwtAuthenticationToken) principal;
        String userName = (String) token.getTokenAttributes().get("name");
        String userEmail = (String) token.getTokenAttributes().get("email");
        return ResponseEntity.ok("Hello Admin \nUser Name : " + userName + "\nUser Email : " + userEmail);
    }

    @GetMapping("/user")
    public ResponseEntity<String> getUser(Principal principal) {
        JwtAuthenticationToken token = (JwtAuthenticationToken) principal;
        String userName = (String) token.getTokenAttributes().get("name");
        String userEmail = (String) token.getTokenAttributes().get("email");
        return ResponseEntity.ok("Hello User \nUser Name : " + userName + "\nUser Email : " + userEmail);
    }
}
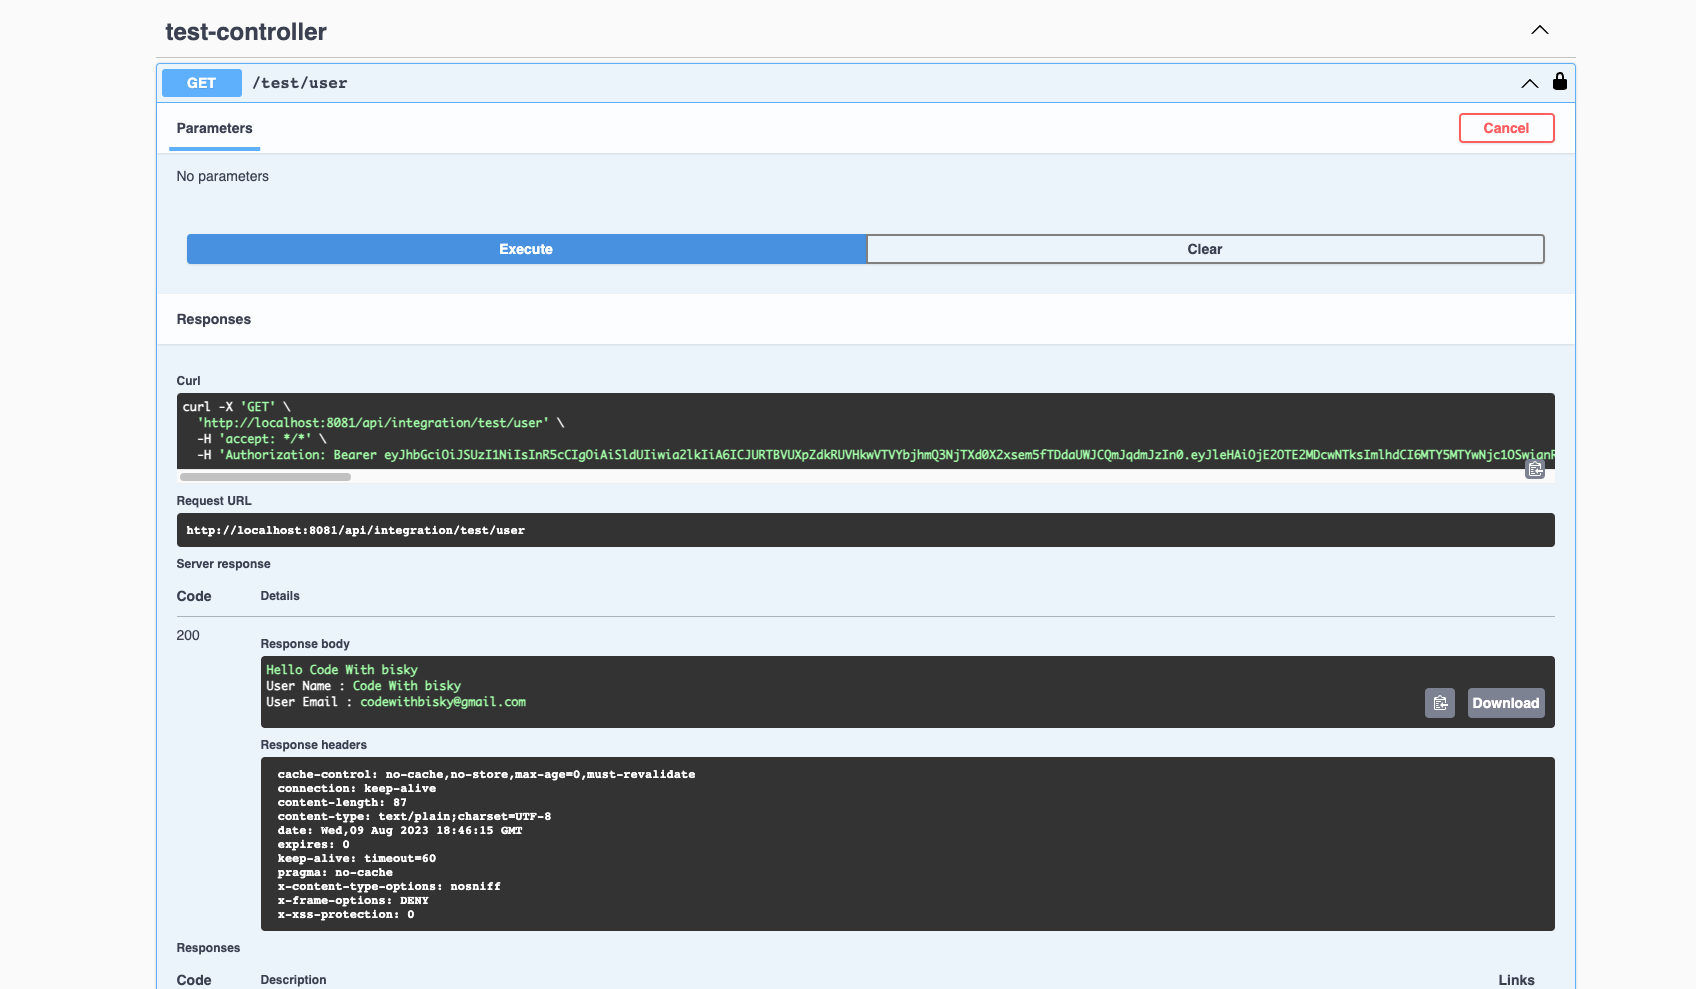
We need to generate a new token and open ths Swagger UI to test get user details http://localhost:8081/api/integration/swagger-ui/index.html Click the Authorization button put access token, or use curl command to get user details
curl --location 'localhost:8081/api/integration/test/user' \
--header 'Authorization: Bearer eyJhbGciOiJSUzI1NiIsI........'
Response after testing. We managed to access the secure endpoint with general role that we created. If we try admin endpoint, we get 403 because our user does not have admin role
Conclusion:
In this tutorial, we've explored the step-by-step process of seamlessly integrating Keycloak with a Spring Boot application. From setting up Keycloak on your server to configuring Spring Boot properties and securing endpoints, you now have a solid foundation to build upon.
Access the full code samples and configurations on our GitHub repository [Link to code samples and configurations]. Remember, understanding the integration between Keycloak and Spring Boot opens the door to building secure and user-friendly applications that users can trust.
If you found this tutorial helpful, don't forget to share it with fellow developers. Subscribe to our YouTube channel for more insightful tutorials and stay tuned for upcoming videos on mastering key technologies.
Thank you for joining us on this journey of integrating Keycloak with Spring Boot. Until next time, happy coding!