Learn Dockerfile: Create and Run Your Spring Boot Project in Docker | Step-by-Step Tutorial
Key Topics covered:
- How to set up Docker on your local machine (Windows, macOS, or Linux)
- Clone an existing Spring Boot project for our practical example
- Step-by-step guide to create a Dockerfile for your Spring Boot project.
- Essential Dockerfile commands to copy files, set up dependencies, and configure your app
- Running your Spring Boot application inside a Docker container with ease
Description:
The tutorial you will learn how to create a Dockerfile and running your Spring Boot project in Docker! Docker is a technology that allows you to package and run software applications, along with all their dependencies, in a consistent and isolated environment called a "container."
Imagine a container as a standalone, lightweight, and portable package that contains everything needed to run an application, including the code, runtime, libraries, and system tools. It's like having a mini-virtual machine, but much more efficient and faster.
Docker makes it easy to create, deploy, and manage applications, as containers can run on any system that supports Docker, whether it's your local development machine, a cloud server, or even your colleague's computer. This eliminates the common issue of "it works on my machine" because Docker ensures consistency across different environments.
1. Install Docker:
In this example, I will show you how to install docker on Mac. The steps are almost the same
- Visit this link to download docker desktop
- Choose Docker Desktop for Mac Intel Chip or Apple Silicon
- Double click the downloaded file and follow instructions
- After installation, search Docker on your Applications and click it

Docker is up and running
2. Clone An Existing Project or Download:
git clone https://gitlab.com/code-with-bisky/spring-boot-third-party-integrations.git
Download the project if you do not have git installed. Click download icon from this link
Open the project with any IDE of your choice (Intelij or Visual Code). You can download Visual Code and is a free application
3. Step-by-step guide to create a Dockerfile for your Spring Boot project:
Let's create a Dockerfile without an extension in root directory of the project
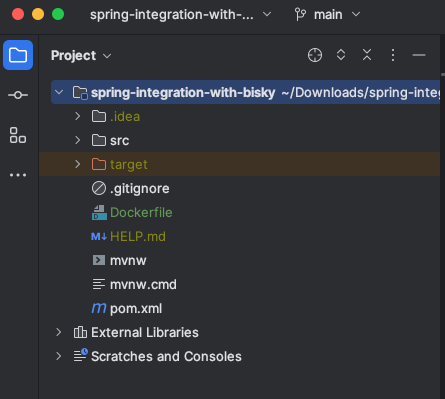
Dockerfile in project root directory
100% working Springboot Dockerfile
FROM maven:3.8.3-openjdk-17 AS MAVEN_BUILD

MAINTAINER codewithbisky@gmail.com

COPY pom.xml /build/

COPY src /build/src/

WORKDIR /build/

RUN mvn clean package

FROM openjdk:17-jdk

ARG JAR_FILE=/build/target/*.jar

WORKDIR /app

COPY --from=MAVEN_BUILD ${JAR_FILE} /app/app.jar

ENTRYPOINT ["java", "-jar", "app.jar"]
Let me go through with you the docker commands above
FROM maven:3.8.3-openjdk-17 AS MAVEN_BUILD
This line sets the base image for the first stage of the Docker build. It uses the official Maven image with version 3.8.3 and OpenJDK 17.
MAINTAINER codewithbisky@gmail.com
This line provides contact information for the maintainer or creator of the Docker image. Note that the MAINTAINER instruction is considered deprecated, and it's recommended to use LABEL instead.
COPY pom.xml /build/
This command copies the pom.xml file from the host directory to the /build/ directory inside the Docker container for the first build stage.
COPY src /build/src/
This line copies the src directory (which contains the source code of the application) from the host directory to the /build/src/ directory inside the Docker container for the first build stage
WORKDIR /build/
This command sets the working directory to /build/, so all subsequent commands in the first build stage will be executed relative to this directory
RUN mvn clean package
This command runs the mvn clean package command inside the container. It tells Maven to clean the project and build the application. The resulting application artifact (usually a JAR file) will be created in the /build/target/ directory
FROM openjdk:17-jdk
This sets the base image for the second stage of the Docker build. It uses the official OpenJDK 17 image
ARG JAR_FILE=/build/target/*.jar
This line defines an argument named JAR_FILE with the value /build/target/*.jar. It allows you to pass the path to the application JAR file when building the Docker image.
WORKDIR /app
This command sets the working directory to /app/ for the second build stage
COPY --from=MAVEN_BUILD ${JAR_FILE} /app/app.jar
This command copies the application JAR file from the first build stage to the /app/app.jar file inside the Docker container for the second build stage. The --from=MAVEN_BUILD specifies that the source of the copy is the first build stage
ENTRYPOINT ["java", "-jar", "app.jar"]
This line sets the default command that will be executed when the Docker container starts. It specifies to run the Java application using the java -jar app.jar command
This Dockerfile sets up a multi-stage build. The first stage uses Maven to build the application and creates the JAR artifact. The second stage uses a minimal OpenJDK image and copies the JAR artifact into it, creating a lightweight image that only contains the necessary runtime dependencies for the application
4. Running your Spring Boot application inside a docker container :
Let's build the image first using the command below
docker build -t codewithbisky/code-with-bisky-spring-integrations .
Command to run docker container
docker run -d -p 9095:9095 --restart=always codewithbisky/code-with-bisky-spring-integrations
- docker run This is the command to run a Docker container from a specified image
- -d This option tells Docker to run the container in "detached" mode, which means the container will run in the background. Without this option, the container would run in the foreground, and you would see its output directly in your terminal
- -p 9095:9095 This option maps the container's port to the host machine's port. In this case, it maps port 9095 from the container to port 9095 on the host machine. This allows you to access the application running inside the container on localhost:9095 or http://<host-ip>:9095, depending on your configuration
- --restart=always This option specifies the restart policy for the container. The value always means that Docker will automatically restart the container if it exits for any reason, except when it is explicitly stopped by the user.
- codewithbisky/code-with-bisky-spring-integrations This is the name of the Docker image that you want to run. It indicates the image named code-with-bisky-spring-integrations available in the Docker Hub repository under the user or organization codewithbisky.
Click below link to see the application running on port 9095 http://localhost:9095/api/integration/swagger-ui/index.html
When you run this command, Docker will pull the codewithbisky/code-with-bisky-spring-integrations image from Docker Hub (if it's not already available on your system), create a new container based on that image, and start the container with the specified options. The Spring application inside the container will be accessible on localhost:9095 or http://<host-ip>:9095,
Conclusion:
Congratulations, you've successfully learned how to create a Dockerfile and run your Spring Boot project in Docker!
In this tutorial, we covered the fundamental concepts of Docker, its importance in modern software development, and how it simplifies the deployment process for Spring Boot applications. By dockerizing your projects, you can now confidently share them with others, ensuring consistent behavior across different environments.
Remember, containerization is not just a trend; it's a game-changer that revolutionizes the way we build, ship, and manage applications. As you continue on your journey as a developer or DevOps enthusiast, mastering Docker will undoubtedly be a valuable skill in your toolbox.
We hope this tutorial has been helpful in expanding your knowledge and sparking your creativity. Stay tuned for more exciting tutorials on our channel, and don't forget to like, subscribe, and hit the notification bell to stay updated with our latest content