Push Docker Image to Docker Hub using Jenkins | Step-by-Step Tutorial
Key Topics covered:
- Configuring Docker credentials in Jenkins
- Creating a simple Dockerized application (Spring Boot App)
- Building a Docker image with Jenkins using a Jenkinsfile
- Pushing the Docker image to Docker Hub automatically
- Understanding Jenkins pipeline stages and steps
- Troubleshooting common issues and errors
Description:
In this tutorial, learn how to push a Docker image to Docker Hub using Jenkins, a popular automation server that helps streamline the software development and deployment process. Docker Hub is a cloud-based registry service that allows you to store and share Docker images with ease.
Prerequisites:
- Basic understanding of Docker and containerization
- Familiarity with Jenkins and its basic concepts
- Docker installed on your system or server
- Docker Hub account (Sign up if you don't have one)
- Java 17 installed
Run these commands to install Java 17, Docker if not installed on your server and Configure Jenkins
sudo apt update
sudo apt install -y openjdk-17-jdk

sudo apt install apt-transport-https ca-certificates curl software-properties-common
curl -fsSL https://download.docker.com/linux/ubuntu/gpg | sudo gpg --dearmor -o /usr/share/keyrings/docker-archive-keyring.gpg
echo "deb [arch=$(dpkg --print-architecture) signed-by=/usr/share/keyrings/docker-archive-keyring.gpg] https://download.docker.com/linux/ubuntu $(lsb_release -cs) stable" | sudo tee /etc/apt/sources.list.d/docker.list > /dev/null
sudo apt update
apt-cache policy docker-ce
sudo apt install docker-ce
sudo systemctl status docker
sudo usermod -aG docker ${USER}
su - ${USER}
groups

sudo usermod -aG docker jenkins
sudo service jenkins restart
1. Create New Item:
On dashboard click New Item
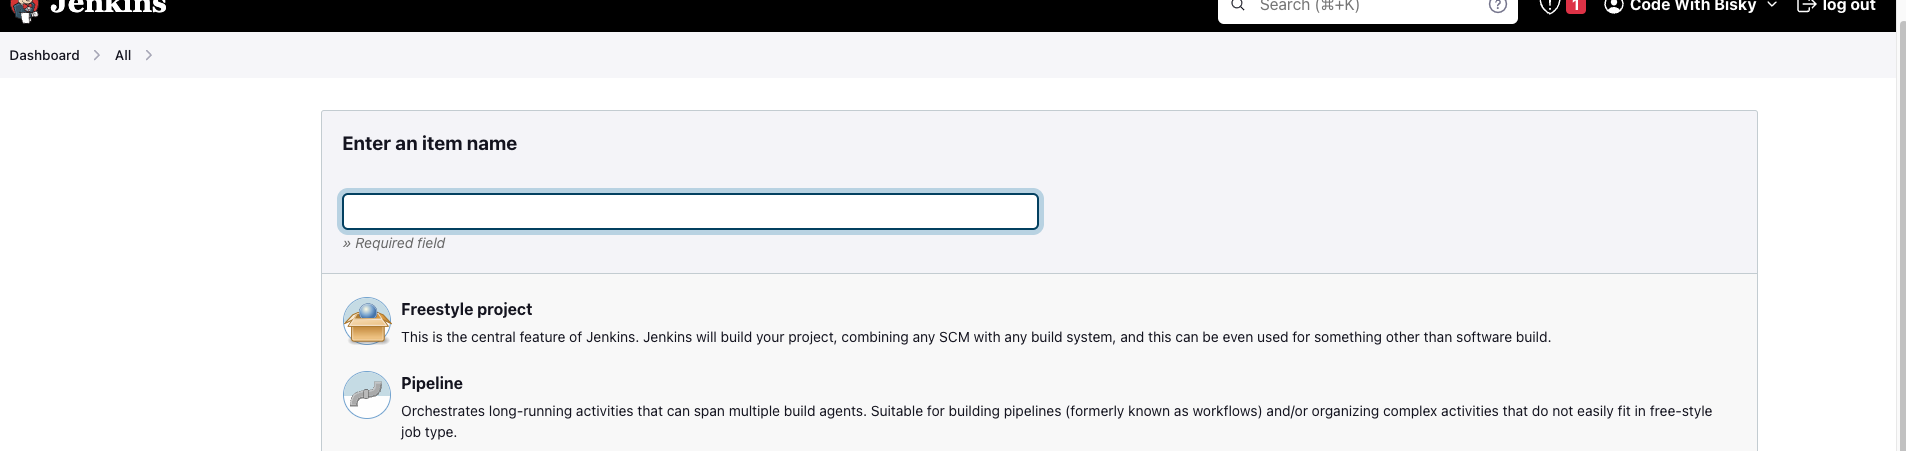
Enter Item Name e.g spring-boot-code-with-bisky-integrations Select Pipeline and Click Ok
2. Configure Pipeline
Enter description: jenkins build docker image and push it to dockerhub
Tick Poll SCM and GitHub hook trigger for GITScm polling
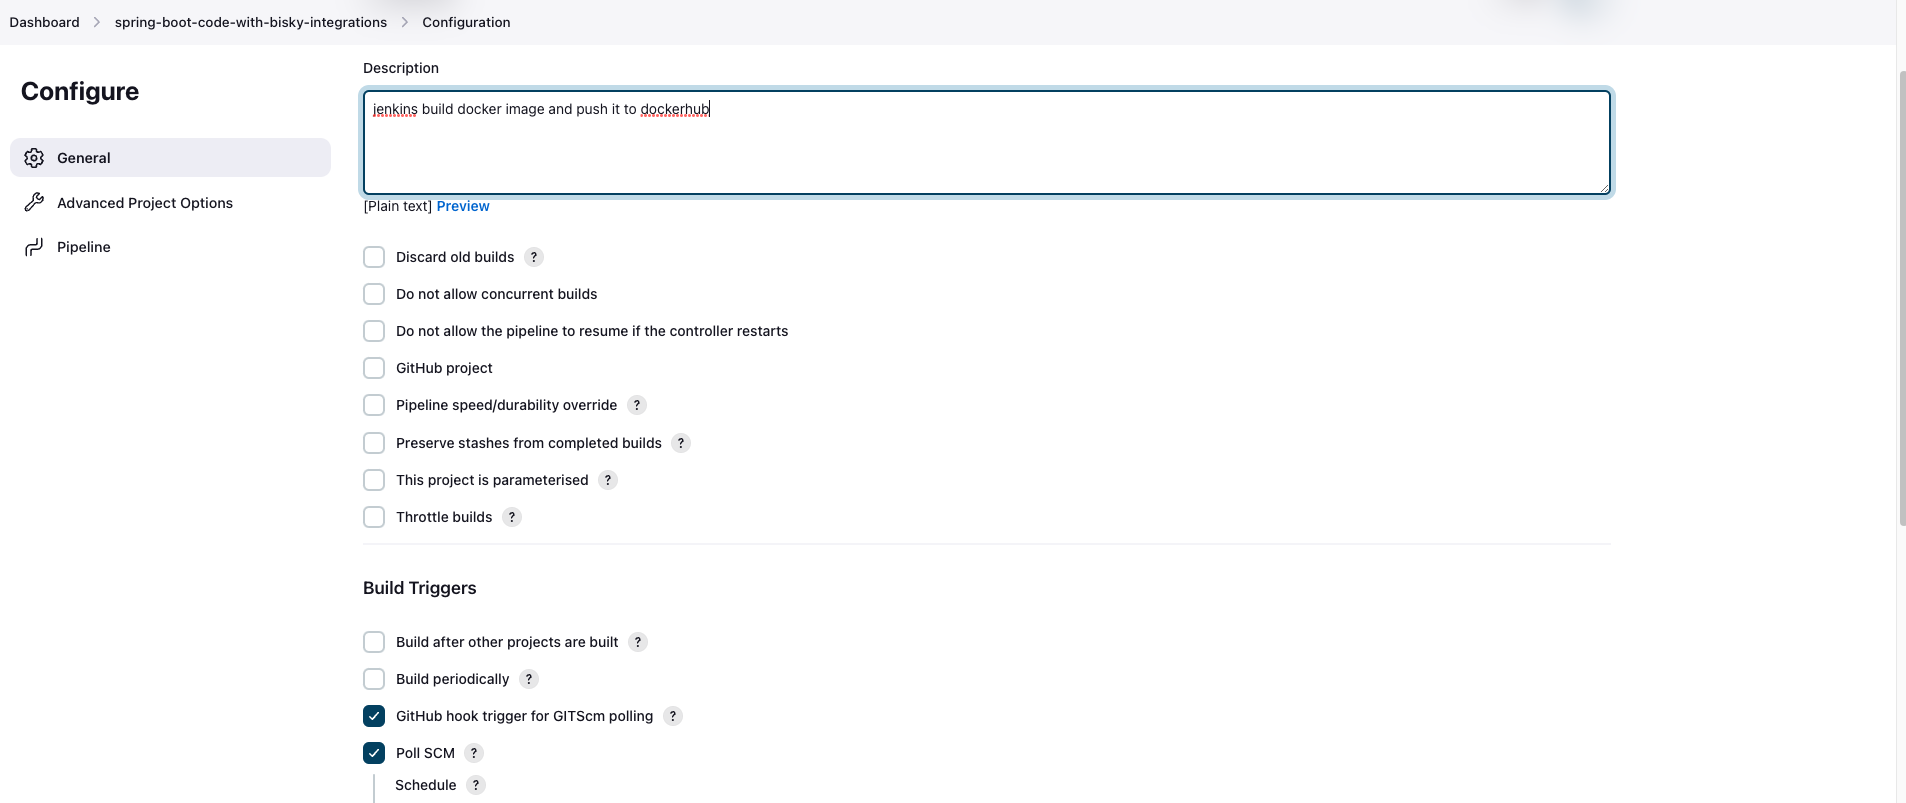
Configure build triggers and got to pipeline section
3. Step-by-step guide to write Pipeline:
Select pipeline script for now and will copy it to Jenkinsfile and add it to our source code
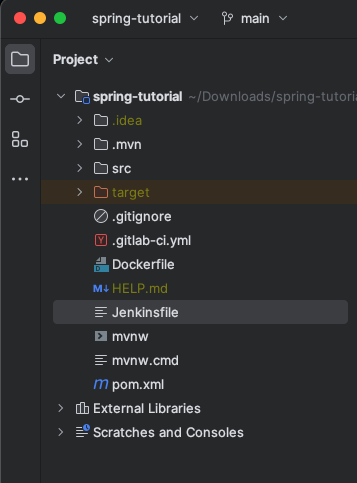
Jenkinsfile in project root directory
100% working Jenkinsfile
pipeline {
    agent any
    tools{
        maven 'maven_3_8_3'
    }
    stages{
        stage('Maven Clean Install'){
            steps{
                checkout scmGit(branches: [[name: '*/main']], extensions: [], userRemoteConfigs: [[url: 'https://gitlab.com/code-with-bisky/spring-boot-for-beginners.git']])
                sh 'mvn -version'
                sh 'mvn clean install'
            }
        }
        stage('Build Docker Image'){
            steps{
                script{
                    sh 'docker build -t marshallchabanga/spring-boot-code-with-bisky-integrations .'
                }
            }
        }
        stage('Push Docker Image to Dockerhub'){
            steps{
                script{
                   withCredentials([string(credentialsId: 'DOCKER_PASSWORD', variable: 'DOCKER_PASSWORD')]) {
                sh 'docker login -u marshallchabanga -p ${DOCKER_PASSWORD}'
}
                   sh 'docker push marshallchabanga/spring-boot-code-with-bisky-integrations'
                }
            }
        }
    }
}
Let's go through the Jenkinsfile step-by-step to understand what each section does
pipeline
This indicates that you are defining a Jenkins Pipeline. Jenkins Pipeline is a suite of plugins that allow you to define your build process as a script. It provides great flexibility and control over the entire build and deployment process.
agent any
This specifies that the Jenkins Pipeline can be executed on any available agent (i.e., any available Jenkins node).
tools
This section specifies the tools to be used during the build process. In this case, it sets the Maven version to 'maven_3_8_3'. It means that Jenkins will automatically install and use Maven version 3.8.3 for this pipeline
stages:
This defines the stages of your pipeline, each representing a different phase of your build and deployment process.
stage('Maven Clean Install'):
This is the first stage of your pipeline. It represents the process of cleaning the Maven project and installing dependencies.
steps:
This defines the actions to be performed within each stage.
checkout scmGit:
This step checks out the source code from the specified Git repository. It checks out the 'main' branch from the repository 'https://gitlab.com/code-with-bisky/spring-boot-for-beginners.git'.
sh 'mvn clean install:
This step executes the 'mvn clean install' command to build and package the Maven project.
stage('Build Docker Image'):
This is the second stage of your pipeline. It represents the process of building a Docker image for your application.
script:
This allows you to run multiple commands within a script block
sh 'docker build -t marshallchabanga/spring-boot-code-with-bisky-integrations .:
This step builds a Docker image with the tag 'marshallchabanga/spring-boot-code-with-bisky-integrations'. The '.' at the end indicates that the Docker build context is the current directory.
stage('Push Docker Image to Dockerhub'):
This is the third stage of your pipeline. It represents the process of pushing the Docker image to Docker Hub.
withCredentials:
Click Pipeline Syntax and choose withCredentials on Sample Step. Verify with the image below
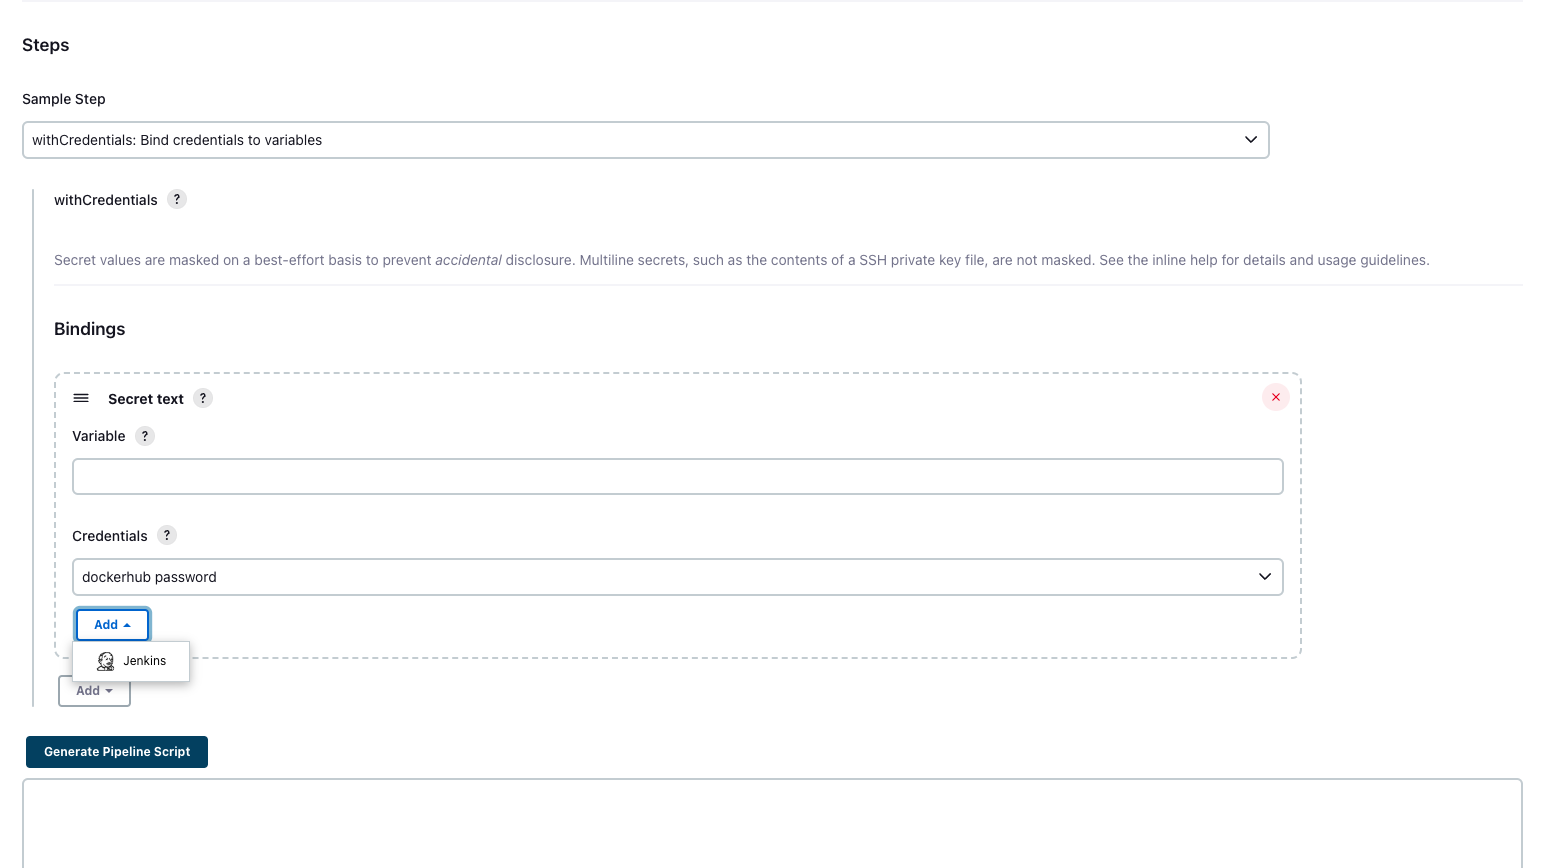
Create credentials by clicking Add and then Jenkins on Credentials Section.
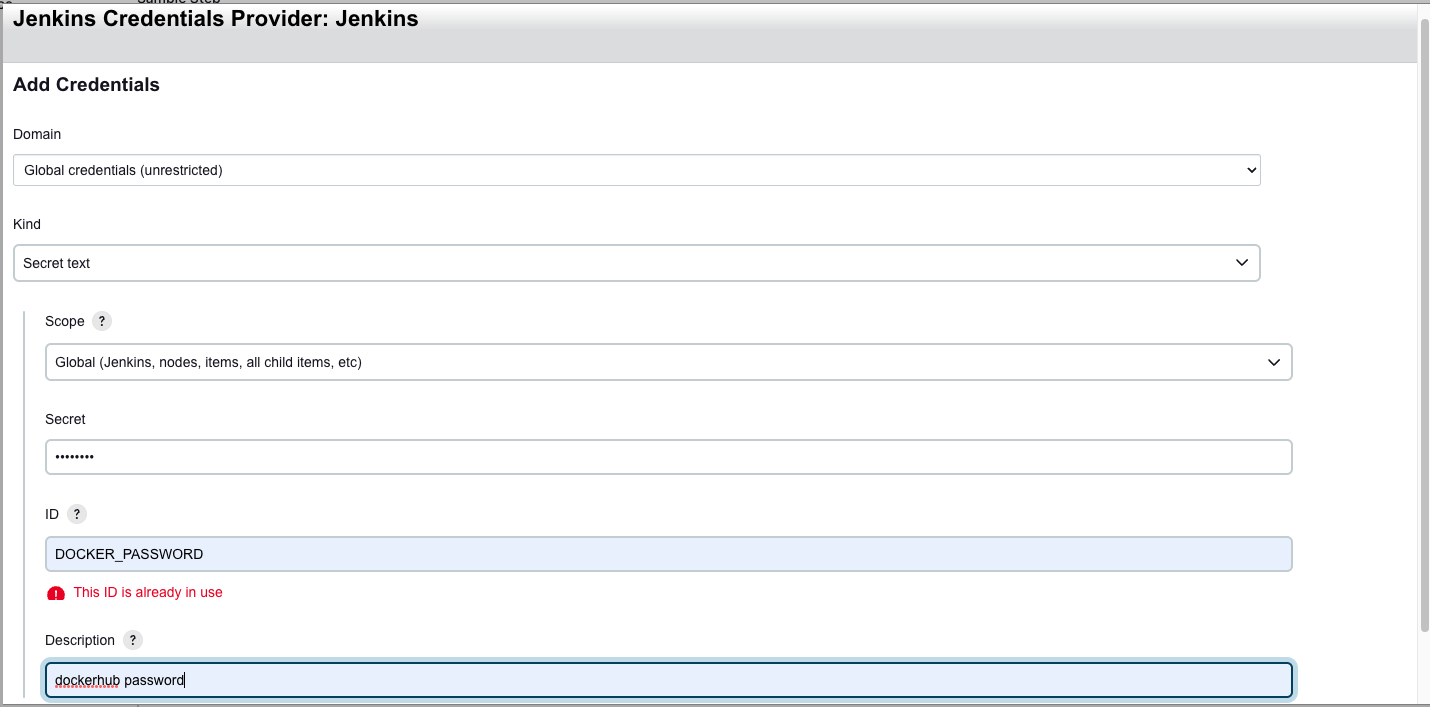
Select Secrete Text Always. Click Add and then click button Generate Pipeline Script and copy the script
This block allows you to use sensitive credentials securely in your pipeline. In this case, it uses the 'DOCKER_PASSWORD' credential and assigns it to the 'DOCKER_PASSWORD' environment variable
sh 'docker login -u marshallchabanga -p ${DOCKER_PASSWORD}':
This step logs in to Docker Hub using the provided username 'marshallchabanga' and the 'DOCKER_PASSWORD' environment variable.
sh 'docker push marshallchabanga/spring-boot-code-with-bisky-integrations':
This step pushes the built Docker image with the specified tag to Docker Hub
That's a brief overview of what each section in your Jenkinsfile does. It represents a simple Jenkins Pipeline that performs Maven build, Docker image building, and pushing the Docker image to Docker Hub
Conclusion:
In this Jenkins tutorial, we have learned how to automate the process of pushing a Docker image to Docker Hub using Jenkins Pipeline. By integrating Jenkins with Docker, we can enhance our software development workflow and streamline the continuous integration and continuous deployment (CI/CD) process.
We began by setting up Jenkins on our system and configuring the necessary tools, such as Maven, for our build process. Then, we created stages in our Jenkinsfile, each representing a crucial step in the build and deployment pipeline.
The first stage involved cleaning and building the Maven project, ensuring that all dependencies are resolved and the application is packaged successfully.
In the second stage, we leveraged Docker to build a Docker image of our application. Docker images offer portability, consistency, and isolation, making them ideal for containerized deployments.
Finally, in the last stage, we securely pushed the Docker image to Docker Hub using credentials stored in Jenkins. Docker Hub serves as a centralized repository, allowing easy sharing and distribution of Docker images.
By automating these processes with Jenkins, we achieved a more efficient and reliable software development cycle. Developers can confidently make changes, knowing that the CI/CD pipeline will validate, build, and deploy their applications to Docker Hub seamlessly.
As you continue to explore Jenkins and its vast ecosystem of plugins and integrations, remember that continuous improvement and learning are key. Adapt and customize these techniques to suit your specific project requirements and scale your DevOps practices.
Thank you for joining us in this tutorial! If you found this tutorial helpful, don't forget to like, share, and subscribe to our channel for more DevOps and automation content.