Complete Guide: Creating GitLab CI for Dockerizing Spring Project & Setting Up Docker Repository
Key Topics covered:
- Introduction to GitLab CI and its role in automating the development process
- Setting up a .gitlab-ci.yml file to define your CI/CD pipeline.
- Understanding stages and jobs to organize your CI workflow effectively.
- Building and testing your project using different job runners.
- Dockerizing your application with a well-structured Dockerfile.
- Leveraging GitLab's built-in Docker registry for image storage.
- Pushing Docker images to the Docker repository for deployment.
- Integrating Docker Compose for multi-container applications.
Description:
This comprehensive tutorial walks you through every step, from setting up a robust GitLab CI pipeline to efficiently Dockerizing your project. Learn how to build, test, and deploy with confidence using Docker and GitLab CI. Take full control of your development process while automating workflows with ease. Plus, set up a Docker repository for effortless deployment. Elevate your DevOps game and boost collaboration today. Join us and conquer the world of Dockerized projects with GitLab CI!
With hands-on examples and explanations, this tutorial will empower you to Dockerize your projects and manage their deployment effortlessly using GitLab CI. Boost collaboration, productivity, and code reliability by automating your development tasks with this efficient CI/CD setup.
1. Create Hub Account:
- Visit the docker hub website and create an account
- Once you are logged in. Click Create repository button
- Enter your Repository Name code-with-bisky-spring-integrations
- Choose your preferred visibility either public or private
- Click Create
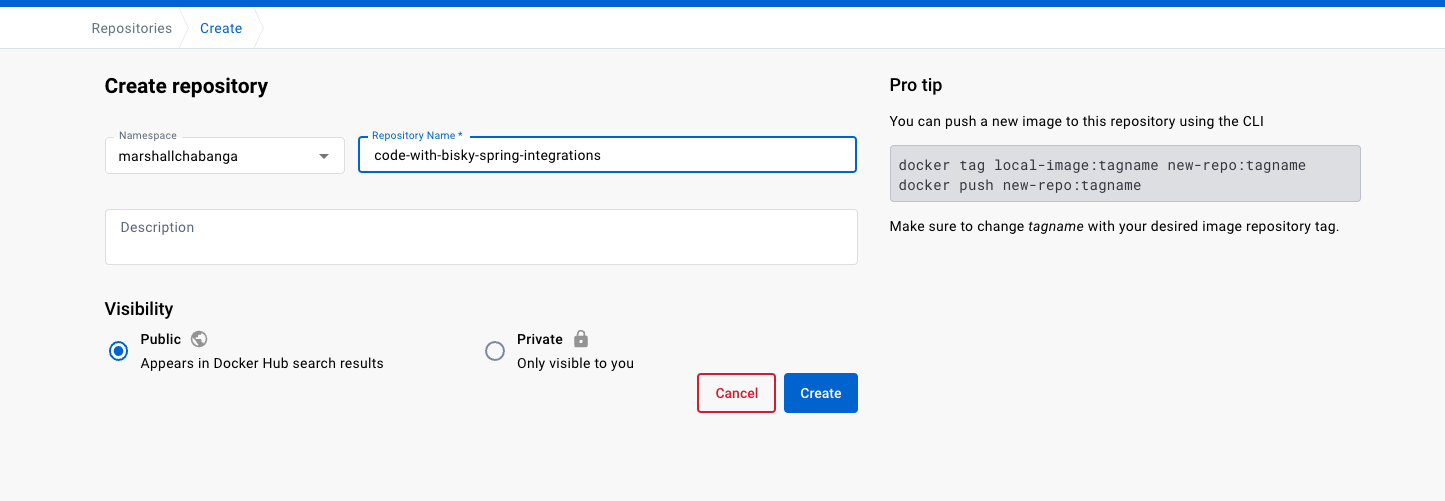
Create Docker Repository
2. Create Access Tokens
Create your access token and also enable Two-Factor Authentication. Visit this link
Keep your access token somewhere safe and don't share it with anyone. We will need it when configuring our gilab-ci.

Create New Access Token
3. Step-by-step guide to create a .gitlab-ci.yml:
Let's create a .gitlab-ci.yml in the root directory of the project
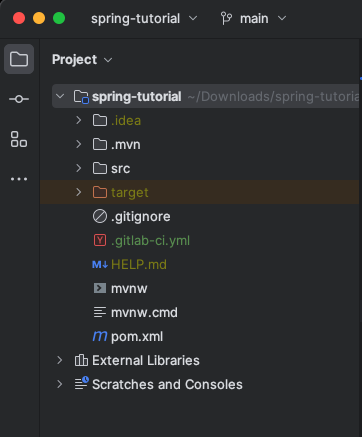
.gitlab-ci.yml in project root directory
100% working Springboot .gitlab-ci.yml
services:
  - docker:19.03.7-dind
stages:
  - build jar
  - build and push docker image
  - deploy
variables:
  APPLICATION_NAME: "spring-boot-code-with-bisky-integrations"
  TAG_NAME: "dev"
  DOCKER_IMAGE: "marshallchabanga/spring-boot-code-with-bisky-integrations"
build:
  image: maven:3.8.3-openjdk-17
  stage: build jar
  script:
    - mvn clean package
  artifacts:
    paths:
      - target/*.jar
docker build:
  image: docker:stable
  stage: build and push docker image
  rules:
    - if: ($CI_COMMIT_BRANCH == "main" || $CI_COMMIT_REF_NAME == "main")
      variables:
        TAG_NAME: "latest"
    - if: ($CI_COMMIT_BRANCH == "develop" || $CI_COMMIT_REF_NAME == "develop")
      variables:
        TAG_NAME: "develop"
  script:
    - docker build -t $DOCKER_IMAGE:$TAG_NAME .
    - docker login -u $DOCKER_USER -p $DOCKER_PASSWORD docker.io
    - docker push $DOCKER_IMAGE:$TAG_NAME
Let me go through with you the instructions and commands above
services
The services section specifies the Docker image that will be used as a service during the CI/CD process. In this case, it uses the Docker image docker:19.03.7-dind, which includes Docker-in-Docker (DinD). This allows your CI/CD pipeline to run Docker commands inside the container, enabling you to build and push Docker images from within your CI/CD jobs
stages
The stages section defines the different stages of your CI/CD pipeline. Each stage represents a logical step in the process. The stages listed here are: "build jar," "build and push docker image," and "deploy." Jobs defined in the .gitlab-ci.yml file will be executed in the order of these stages
variables
The variables section defines environment variables that will be used throughout the pipeline. Here, you have defined the following variables:
- APPLICATION_NAME - The name of your Spring Boot application.
- TAG_NAME - The Docker image tag. It is initially set to "dev."
- DOCKER_IMAGE - The name of the Docker image to be built and pushed
build job:
- This is the first job in the pipeline, defined under the "build jar" stage
- It uses the Maven image (maven:3.6.3-jdk-11-slim) to build the Spring Boot application
- The script contains the command mvn clean package, which will clean the project and create the JAR artifact in the target directory
- The artifacts section specifies that the JAR file created during this job should be saved as an artifact, making it available for later stages in the pipeline
docker build job:
- This is the second job in the pipeline, defined under the "build and push docker image" stage
- It uses the Docker image docker:stable to perform Docker-related tasks
- The rules section specifies conditional rules for when this job should be executed. If the branch or ref name is "main," the TAG_NAME will be set to "latest." If the branch or ref name is "develop," the TAG_NAME will be set to "develop."
- The script section contains the following commands:
docker build: This builds the Docker image using the Dockerfile in the project directory. The image will be tagged with the $DOCKER_IMAGE:$TAG_NAME format
docker login: This command logs in to Docker Hub (docker.io) using the provided $DOCKER_USER and $DOCKER_PASSWORD variables.
docker push: This pushes the built Docker image to Docker Hub, using the previously specified tag.
The .gitlab-ci.yml file defines a complete CI/CD pipeline that will build your Spring Boot application, create a Docker image, and push it to Docker Hub with different tags based on the branch or ref name. This allows you to have separate images for different branches or environments (e.g., "latest" for main and "develop" for the develop branch).
3. Add Gitlab Project Variables
Add CI/CD Variables on your project settings
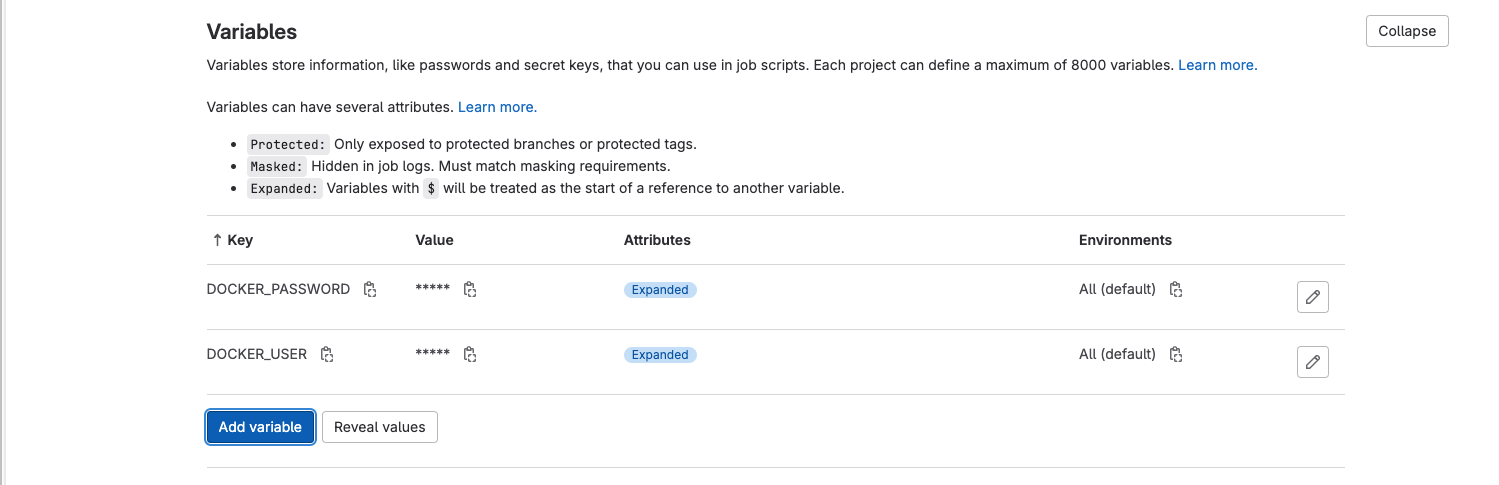
Add DOCKER_PASSWORD and DOCKER_USER as variables.
- DOCKER_PASSWORD - Is the access key you created
- DOCKER_USER - Is the username of your dockerhub account
We need to commit the .gitlab-ci.yml file and push it. Since we are using a Shared runner, we have to add visa card but won't be charged. This is done to discourage and reduce Gitlab infrastructure. Click th button Validate account after you push your code.
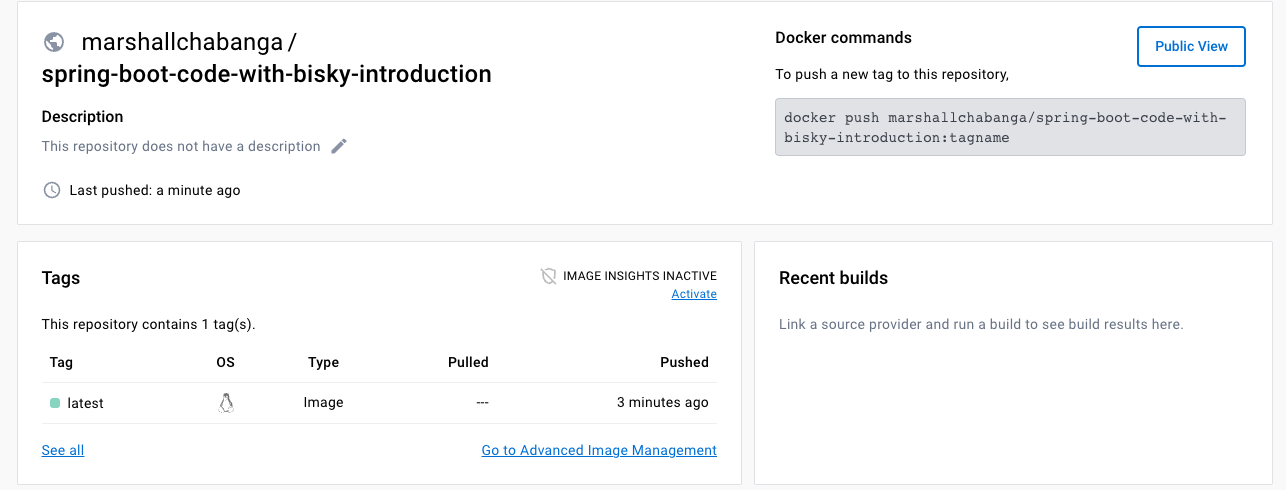
Images showing successful CI/CD of our project
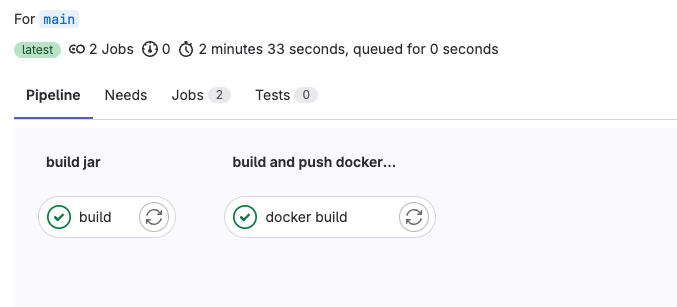
The image has been pushed to the docker repository successfully
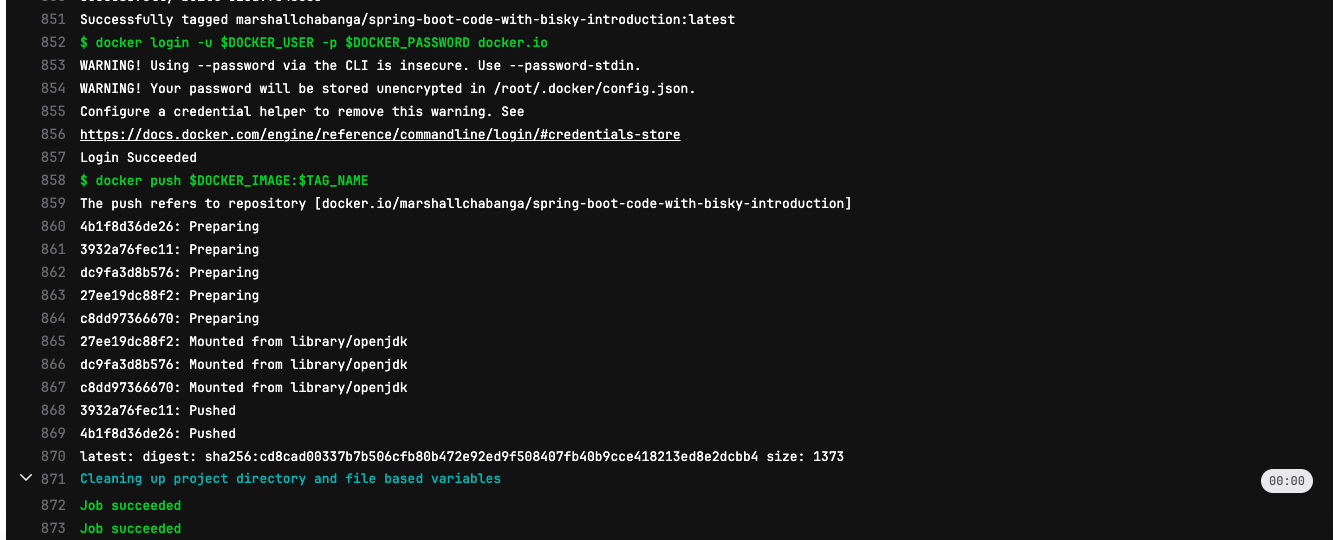
Pushed docker image
Conclusion:
In conclusion, mastering GitLab CI for Dockerizing your projects and setting up a Docker repository empowers you to unlock the true potential of continuous integration and streamline your development process. With the insights gained from this comprehensive guide, you can confidently build, test, and deploy your applications with ease. Embrace the power of automation and collaboration to propel your projects to new heights. Join the community of skilled developers who leverage Docker and GitLab CI to revolutionize their development workflows. Let your coding journey take flight as you create, innovate, and achieve remarkable success in the world of Dockerized projects. Happy coding and Dockerizing!